

Question: 5. In this exercise, you will create a splash screen that has a transparent background. a. Open the Petal Solution (Petal Solution.sln) file contained in
5. In this exercise, you will create a splash screen that has a transparent background.
a. Open the Petal Solution (Petal Solution.sln) file contained in the VB2012\Chap01\Petal Solution folder. If necessary, open the designer window.
b. Add a picture box control to the form. The picture box should display the image stored in the PetalShop.png file, which is contained in the VB2012\Chap01 folder. Set the picture box’s size mode to StretchImage. Set its name property to picPetal.
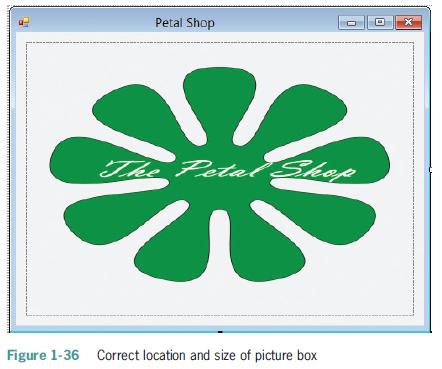
Position and size the picture box as shown in Figure 1-36.
c. Click the form’s title bar to select the form. Set the form’s FormBorderStyle property to None.
d. Click TransparencyKey in the Properties window. The TransparencyKey property determines the color that will appear transparent when the application is run. For example, you can make the form transparent by setting its TransparencyKey property to the same color as its BackColor property. Click the TransparencyKey property’s list arrow, then click the System tab, and then click Control.
e. Open the Code Editor window. Open the code template for the picPetal control’s Click event procedure. Type Me.Close() and press Enter.
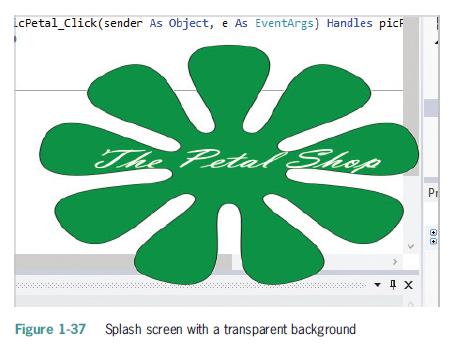
f. Save the solution and then start the application. Because the color specified in the form’s BackColor property is the same as the color specified in the TransparencyKey property, the form appears transparent. As a result, the splash screen shows only the image contained in the picture box. See Figure 1-37.
g. Click the picture box to end the application. Close the Code Editor window and then close the solution.
Petal Shop The Petal Shop Figure 1-36 Correct location and size of picture box
Step by Step Solution
There are 3 Steps involved in it

Get step-by-step solutions from verified subject matter experts