

Question: 3 . 4 Task 4 : Attack Mitigation using HMAC In the tasks so far, we have observed the damage caused when a developer computes
Task : Attack Mitigation using HMAC
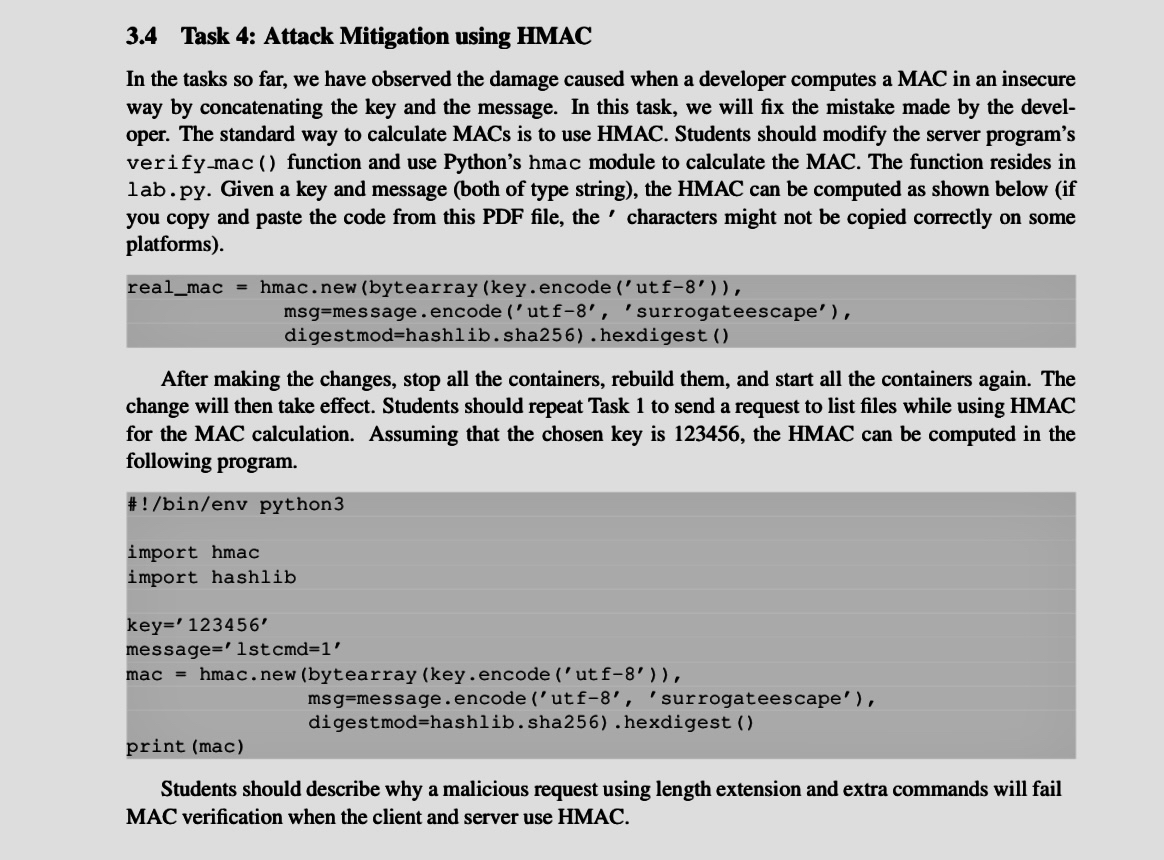
In the tasks so far, we have observed the damage caused when a developer computes a MAC in an insecure way by concatenating the key and the message. In this task, we will fix the mistake made by the developer. The standard way to calculate MACs is to use HMAC. Students should modify the server program's verifymac function and use Python's hmac module to calculate the MAC. The function resides in lab. py Given a key and message both of type string the HMAC can be computed as shown below if you copy and paste the code from this PDF file, the characters might not be copied correctly on some platforms
realmac hmac.new bytearray keyencode utf
msgmessage.encode utf 'surrogateescape'
digestmodhashlib.sha hexdigest
After making the changes, stop all the containers, rebuild them, and start all the containers again. The change will then take effect. Students should repeat Task to send a request to list files while using HMAC for the MAC calculation. Assuming that the chosen key is the HMAC can be computed in the following program.
#binenv python
import hmac
import hashlib
key
message lst
mac hmac. new bytearray keyencode ut
message.encode utf 'surrogateescape'
digestmodhashlib.sha hexdigest
print mac
Students should describe why a malicious request using length extension and extra commands will fail MAC verification when the client and server use HMAC.
Step by Step Solution
There are 3 Steps involved in it
1 Expert Approved Answer
Step: 1 Unlock

Question Has Been Solved by an Expert!
Get step-by-step solutions from verified subject matter experts
Step: 2 Unlock
Step: 3 Unlock