

Question: ALL FILES CAN BE DOWNLOADED HERE https://www.dropbox.com/s/2amxsghkbkwrqvd/Ch04ActivityResourceFiles%20%281%29.zip?dl=0 This exercise has you enhance the Product Manager application by adding a page that lets you add and
ALL FILES CAN BE DOWNLOADED HERE
https://www.dropbox.com/s/2amxsghkbkwrqvd/Ch04ActivityResourceFiles%20%281%29.zip?dl=0
This exercise has you enhance the Product Manager application by adding a page that lets you add and delete categories. Download the resource files and place in your htdocs directory with the path ch04_ex1 Also run the create_db.sql script in the resource files. This creates the database for the following and future exercises. Test the Product Manager application 1. Start your browser and run the application in the ch04_exl directory. To do that, you can use this URL: http://localhost/ch04_exl/ This should display the products for the first category in the database named my_guitar_shopl.
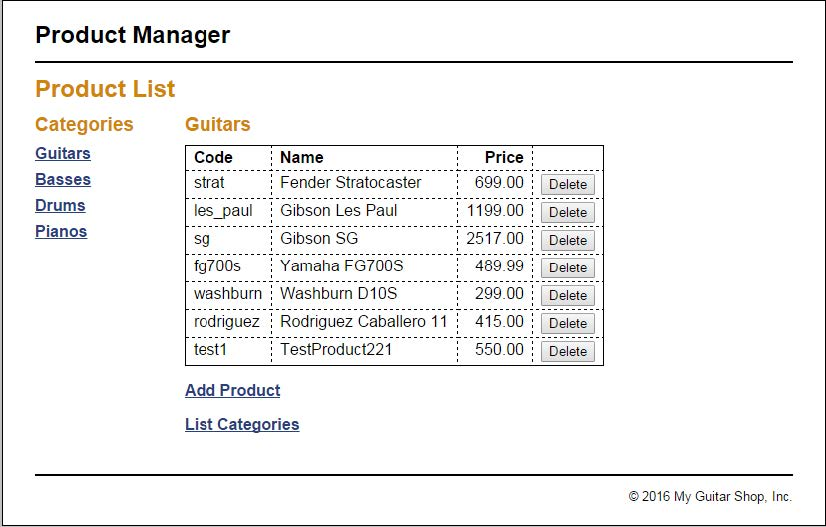
2. View the products in each of the categories. 3. Add a new product to the database. When you add this product, make sure to enter valid values for a product. Then, delete the product you just added from the database. 4. Click on the List Categories link at the bottom of the page. Note that this link leads to a page that's under construction. However, the link back to the Product List page does work. Add a Category List page In the rest of this exercise, you'll add a page that looks like this:
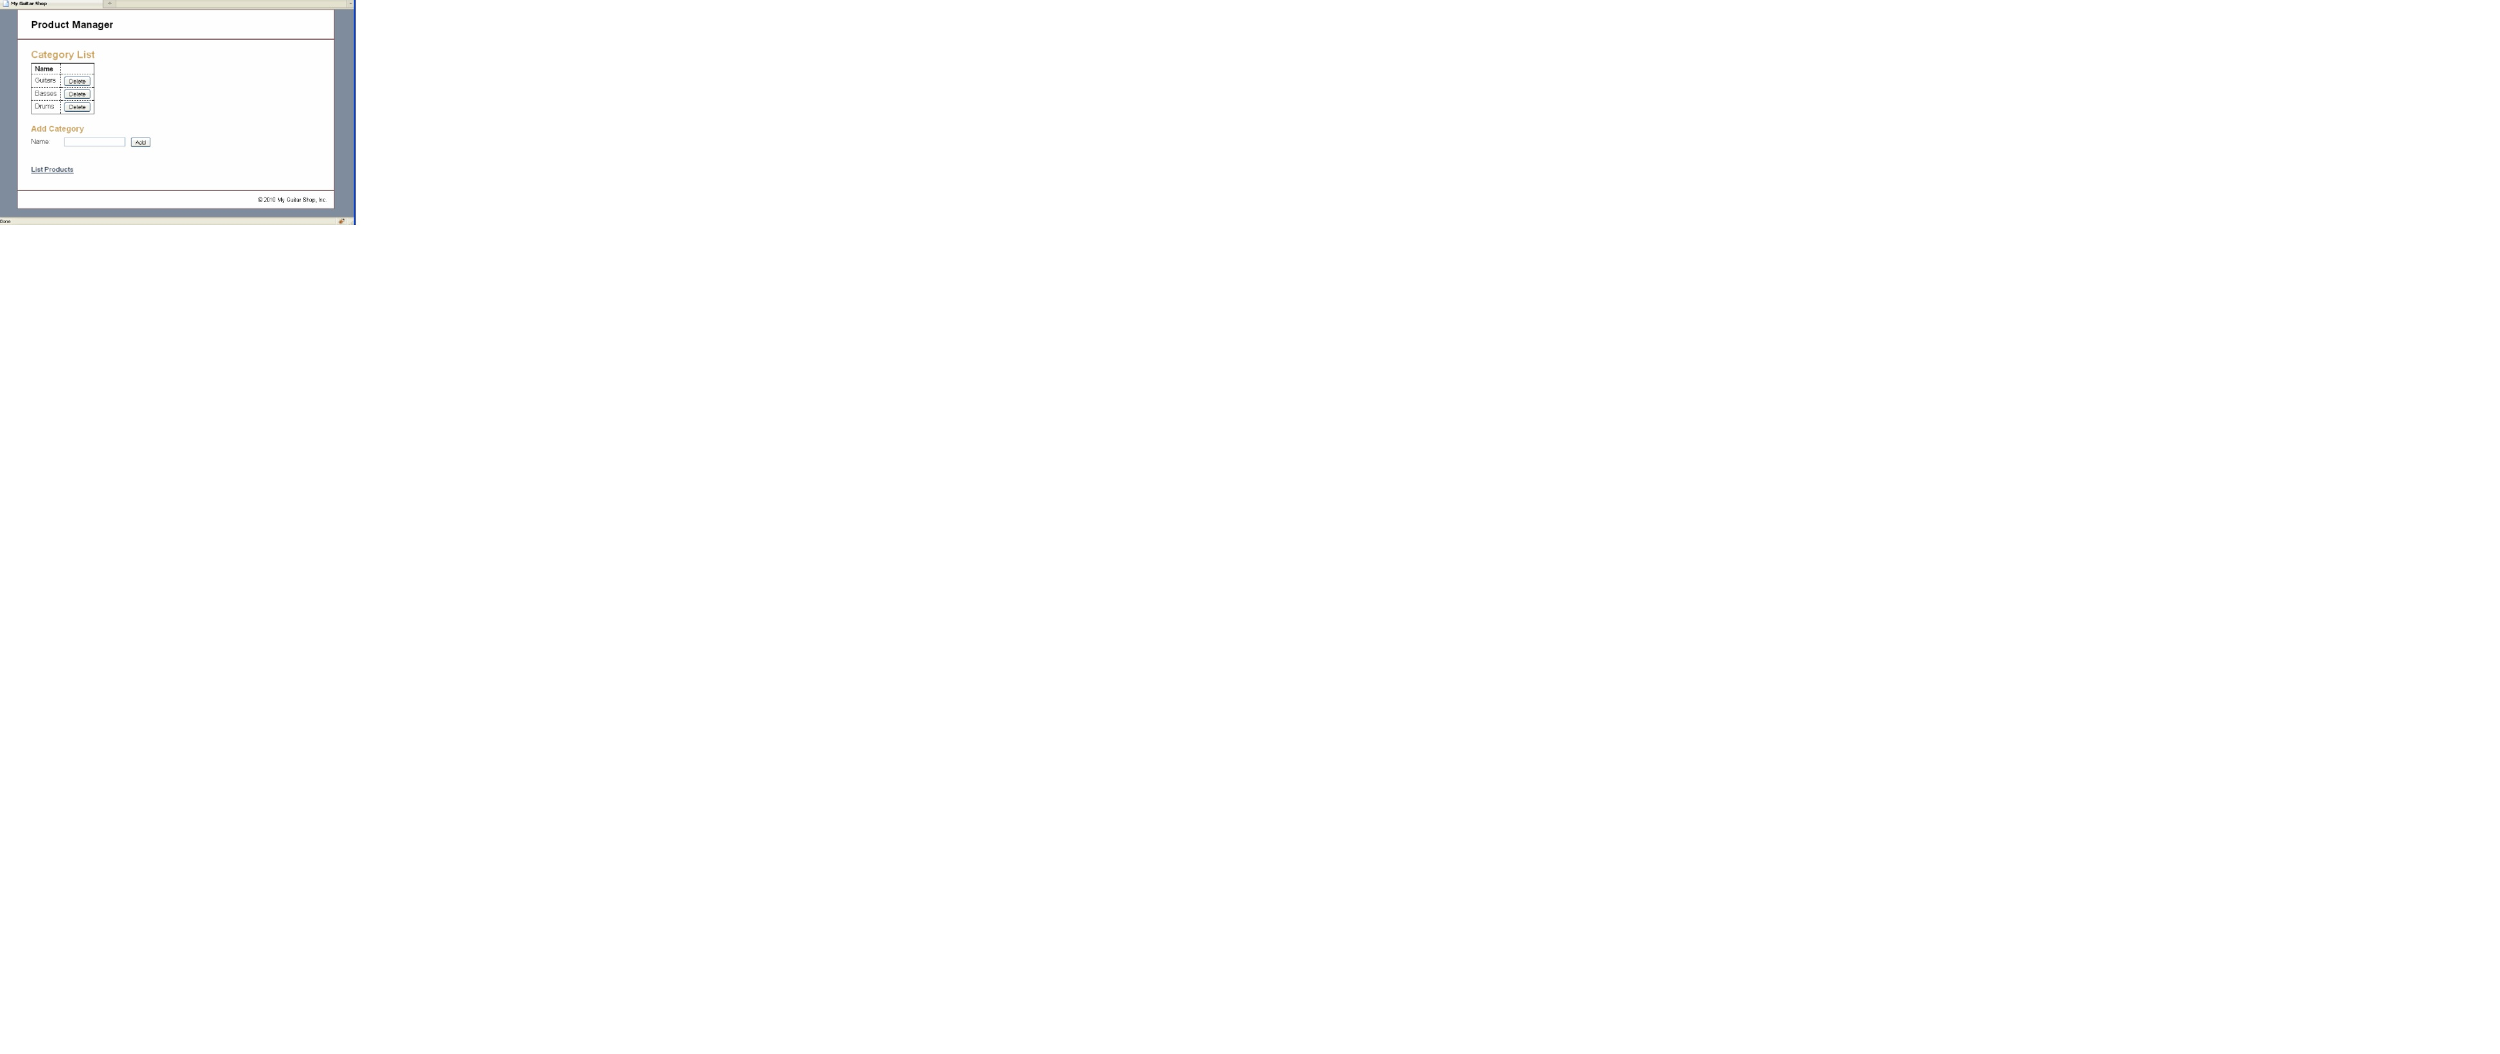
5. Open the category_list.php file that's in the directory for this application. It contains some of the headings that you'll need for this page, and a link back to the Product List page. 6. In the category_list.php file, write the code that creates the category table shown above with all of the category names in the first column and Delete buttons in the second column, similar to how the index.php works. Then, test that this table is displayed correctly. 7. In the category_list.php file, write the code that lets the user add a category to the database. This code should consist of a form that accepts the name for a new category followed by a Submit button that displays ''Add Product", similar to how the add_product_form.php file works. Then, test that this form is displayed correctly. 8. Create an add_category.php file that adds a category to the database and a delete_category.php that deletes a category from the database. These files should display the Category List page after they add or delete a category, similar to how the add_product.php and delete_product.php files work. 9. Test the application by adding two categories. Then, navigate to the Add Product page and note that the drop-down list includes the new categories. 10. Test the application by deleting the categories that you just added. However, don't delete any of the existing categories because that will lead to products without categories. If necessary, though, you can restore the database by running the create_db.sql script again as described in the appendix. 11. Upload to Moodle: add_category.php, delete_category.php and category_list.php.
Step by Step Solution
There are 3 Steps involved in it

Get step-by-step solutions from verified subject matter experts