

Question: based on the steps using wireshark solve the questions below Task 2: Use Wireshark to Examine ARP Exchanges Step 1. Configure Wireshark for packet captures.
 based on the steps using wireshark solve the questions below
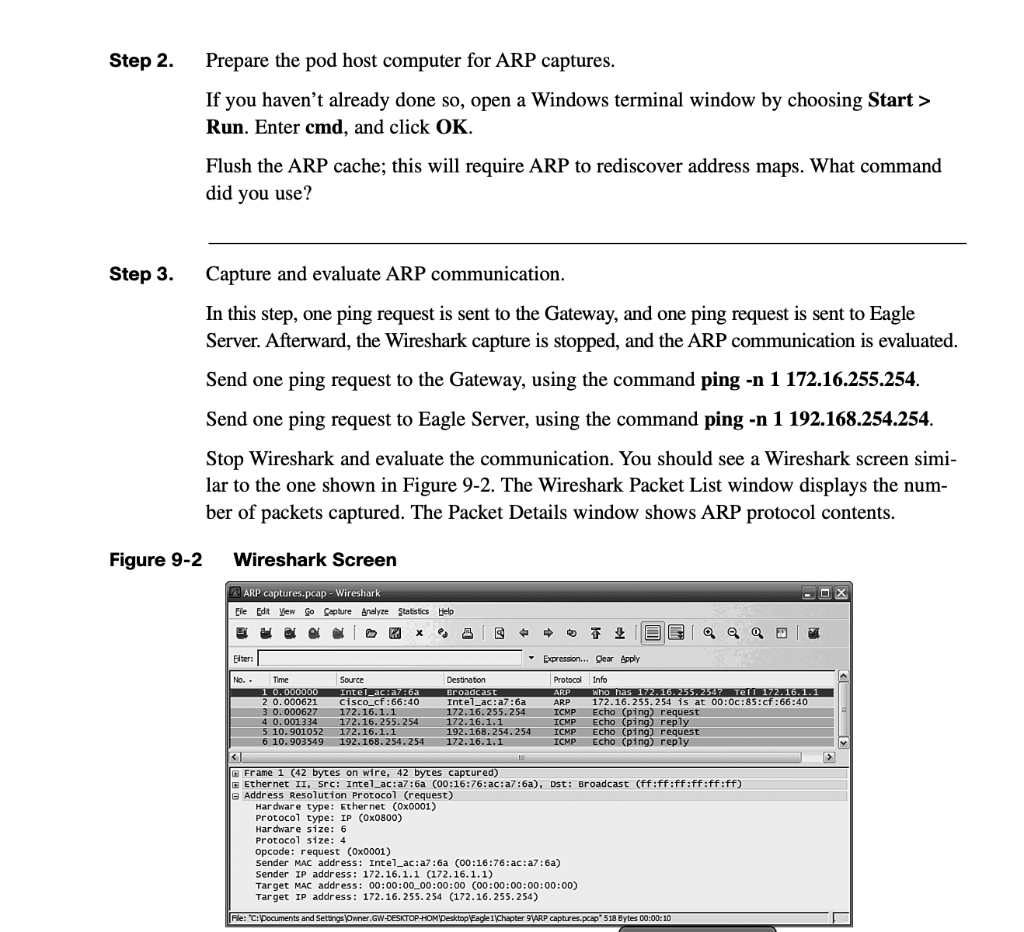
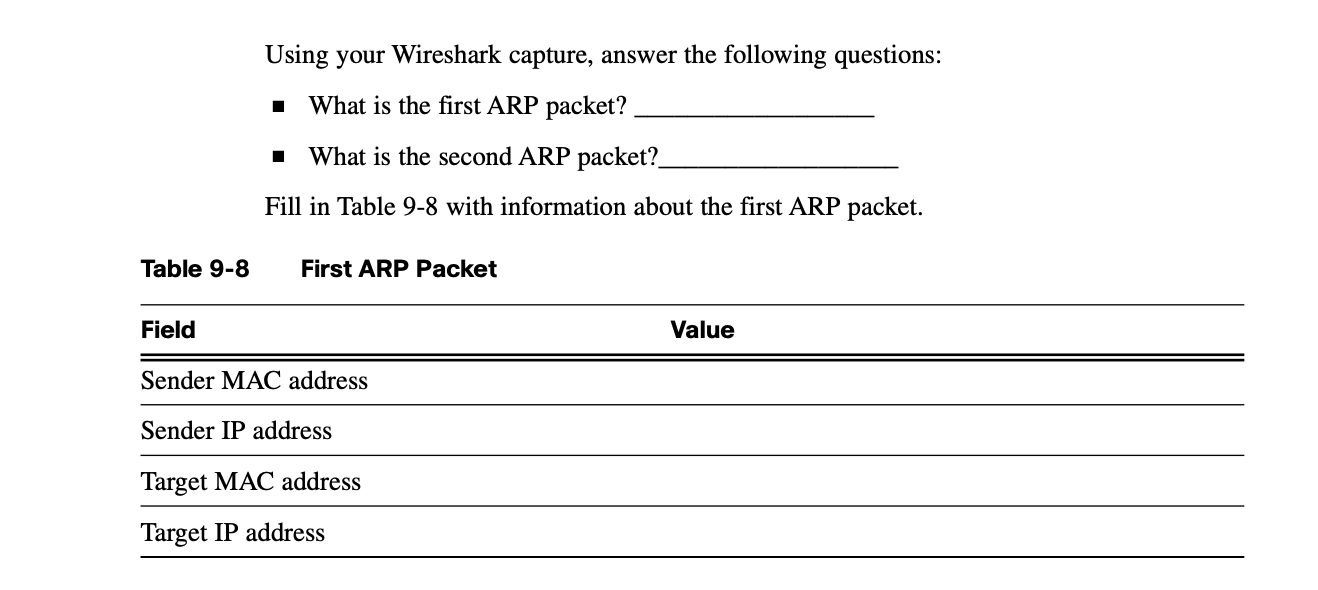
Task 2: Use Wireshark to Examine ARP Exchanges Step 1. Configure Wireshark for packet captures. Prepare Wireshark for captures. Choose Capture > Options. Select the interface that corresponds to the LAN. Check the box to update the list of packets in real time. Click Start. This begins the packet capture. Step 2. Prepare the pod host computer for ARP captures. If you haven't already done so, open a Windows terminal window by choosing Start > Run. Enter cmd, and click OK. Flush the ARP cache; this will require ARP to rediscover address maps. What command did you use? Step 3. Capture and evaluate ARP communication. In this step, one ping request is sent to the Gateway, and one ping request is sent to Eagle Server. Afterward, the Wireshark capture is stopped, and the ARP communication is evaluated. Send one ping request to the Gateway, using the command ping -n 1 172.16.255.254. Send one ping request to Eagle Server, using the command ping -n 1 192.168.254.254. Stop Wireshark and evaluate the communication. You should see a Wireshark screen simi- lar to the one shown in Figure 9-2. The Wireshark Packet List window displays the num- ber of packets captured. The Packet Details window shows ARP protocol contents. Figure 9-2 Wireshark Screen - OX ARP captures.pcap - Wireshark Eile Edit View Go Capture Analyze Statistics Help es S Elter: Expression... Clear Apply No. Time 1 0.000000 2 0.000621 3 0.000627 4 0.001334 5 10.901052 6 10.903549 Source Intel_aciara Cisco_cf:66:40 172.16.1.1 172.16.255.254 172.16.1.1 192.168.254.254 Destination Broadcast Intel_ac:a7:6a 172.16.255.254 172.16.1.1 192.168.254.254 172.16.1.1 Protocol Info ARP who has 172.16.255.254? Tell 172.16.1.1 ARP 172.16.255.254 is at 00:0c:85:cf:66:40 ICMP Echo (ping) request ICMP Echo (ping) reply ICMP Echo (ping) request ICMP Echo (ping) reply G Frame 1 (42 bytes on wire, 42 bytes captured) G Ethernet II, Src: Intel_ac:a7:6a (00:16:76:ac:a7:6a). Dst: Broadcast (ff:ff:ff:ff:ff:ff) e Address Resolution Protocol (request) Hardware type: Ethernet (0x0001) Protocol type: IP (0X0800) Hardware size: 6 Protocol size: 4 Opcode: request (0x0001) Sender MAC address: Intel_ac:a7:6a (00:16:76:ac:a7:6a) Sender IP address: 172.16.1.1 (172.16.1.1) Target MAC address: 00:00:00_00:00:00 00:00:00:00:00:00) Target IP address: 172.16.255.254 (172.16.255.254) File:C:\Documents and Settings Owner.GW-DESKTOP HOM Desktop Eagle 1 Chapter 9 ARP captures.pcap 518 Bytes 00:00:10 Using your Wireshark capture, answer the following questions: What is the first ARP packet? What is the second ARP packet? Fill in Table 9-8 with information about the first ARP packet. Table 9-8 First ARP Packet Field Value Sender MAC address Sender IP address Target MAC address Target IP address Task 2: Use Wireshark to Examine ARP Exchanges Step 1. Configure Wireshark for packet captures. Prepare Wireshark for captures. Choose Capture > Options. Select the interface that corresponds to the LAN. Check the box to update the list of packets in real time. Click Start. This begins the packet capture. Step 2. Prepare the pod host computer for ARP captures. If you haven't already done so, open a Windows terminal window by choosing Start > Run. Enter cmd, and click OK. Flush the ARP cache; this will require ARP to rediscover address maps. What command did you use? Step 3. Capture and evaluate ARP communication. In this step, one ping request is sent to the Gateway, and one ping request is sent to Eagle Server. Afterward, the Wireshark capture is stopped, and the ARP communication is evaluated. Send one ping request to the Gateway, using the command ping -n 1 172.16.255.254. Send one ping request to Eagle Server, using the command ping -n 1 192.168.254.254. Stop Wireshark and evaluate the communication. You should see a Wireshark screen simi- lar to the one shown in Figure 9-2. The Wireshark Packet List window displays the num- ber of packets captured. The Packet Details window shows ARP protocol contents. Figure 9-2 Wireshark Screen - OX ARP captures.pcap - Wireshark Eile Edit View Go Capture Analyze Statistics Help es S Elter: Expression... Clear Apply No. Time 1 0.000000 2 0.000621 3 0.000627 4 0.001334 5 10.901052 6 10.903549 Source Intel_aciara Cisco_cf:66:40 172.16.1.1 172.16.255.254 172.16.1.1 192.168.254.254 Destination Broadcast Intel_ac:a7:6a 172.16.255.254 172.16.1.1 192.168.254.254 172.16.1.1 Protocol Info ARP who has 172.16.255.254? Tell 172.16.1.1 ARP 172.16.255.254 is at 00:0c:85:cf:66:40 ICMP Echo (ping) request ICMP Echo (ping) reply ICMP Echo (ping) request ICMP Echo (ping) reply G Frame 1 (42 bytes on wire, 42 bytes captured) G Ethernet II, Src: Intel_ac:a7:6a (00:16:76:ac:a7:6a). Dst: Broadcast (ff:ff:ff:ff:ff:ff) e Address Resolution Protocol (request) Hardware type: Ethernet (0x0001) Protocol type: IP (0X0800) Hardware size: 6 Protocol size: 4 Opcode: request (0x0001) Sender MAC address: Intel_ac:a7:6a (00:16:76:ac:a7:6a) Sender IP address: 172.16.1.1 (172.16.1.1) Target MAC address: 00:00:00_00:00:00 00:00:00:00:00:00) Target IP address: 172.16.255.254 (172.16.255.254) File:C:\Documents and Settings Owner.GW-DESKTOP HOM Desktop Eagle 1 Chapter 9 ARP captures.pcap 518 Bytes 00:00:10 Using your Wireshark capture, answer the following questions: What is the first ARP packet? What is the second ARP packet? Fill in Table 9-8 with information about the first ARP packet. Table 9-8 First ARP Packet Field Value Sender MAC address Sender IP address Target MAC address Target IP address
Step by Step Solution
There are 3 Steps involved in it

Get step-by-step solutions from verified subject matter experts