

Question: C S C 1 7 2 0 L A B F I V E-CLASS IMPLEMENTATION Use C++ code and no code that's too complicated. The
C S C 1 7 2 0 L A B F I V E-CLASS IMPLEMENTATION
Use C++ code and no code that's too complicated.
The test program made to validate the code.
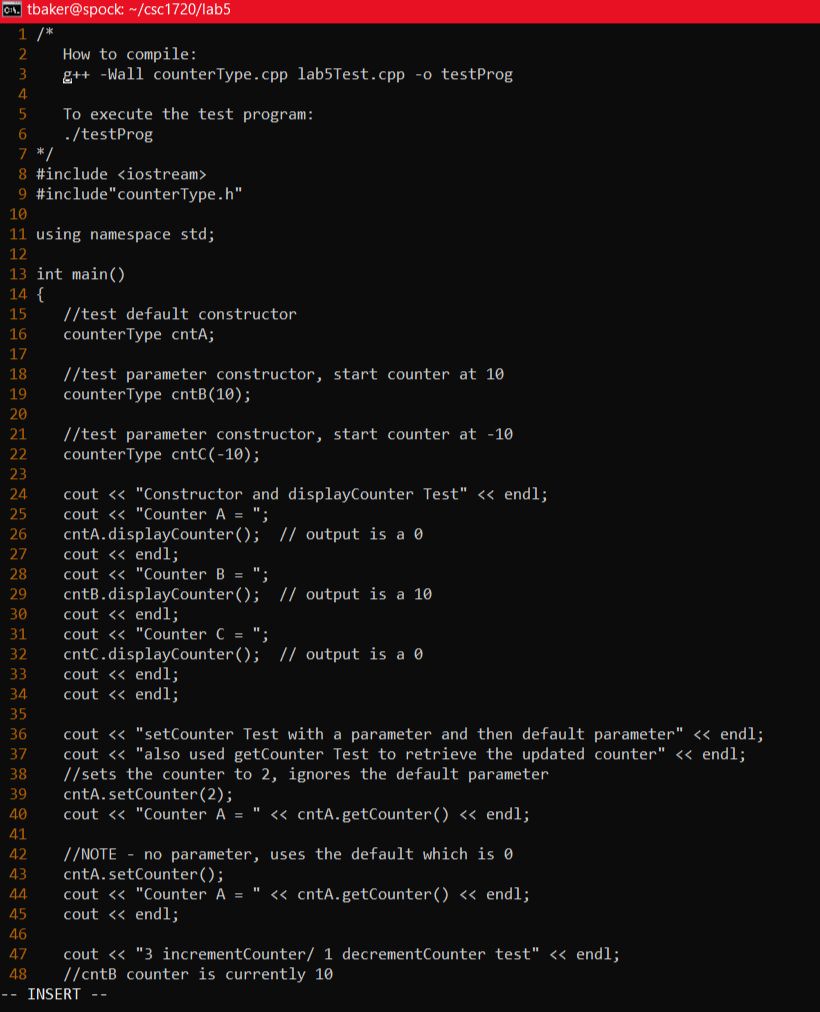
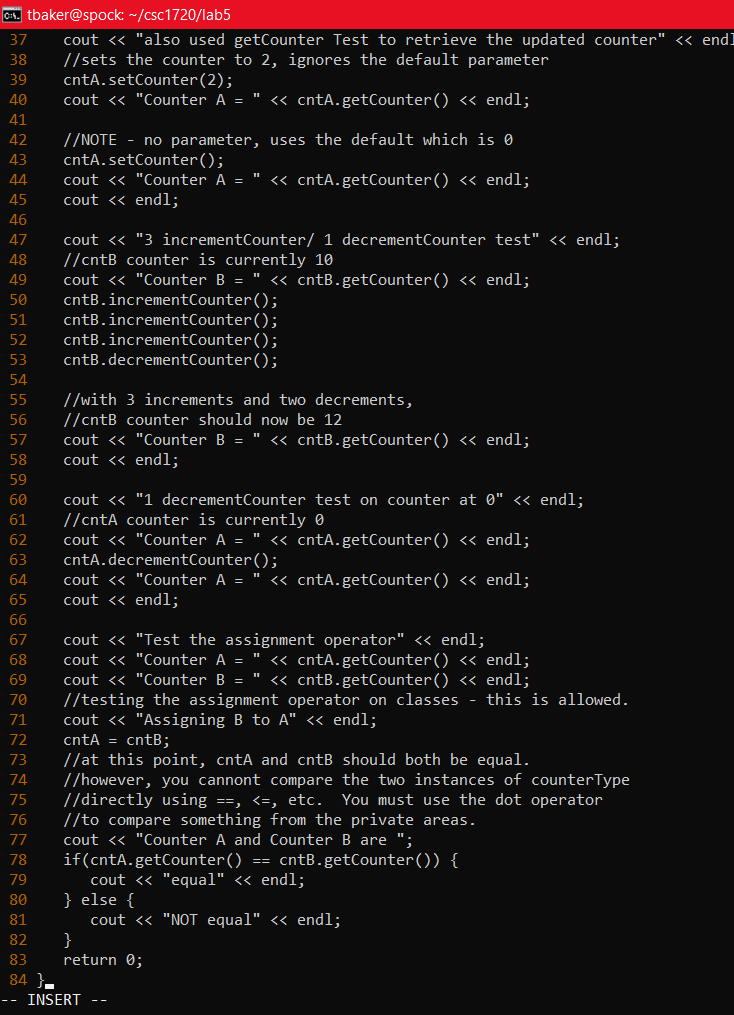
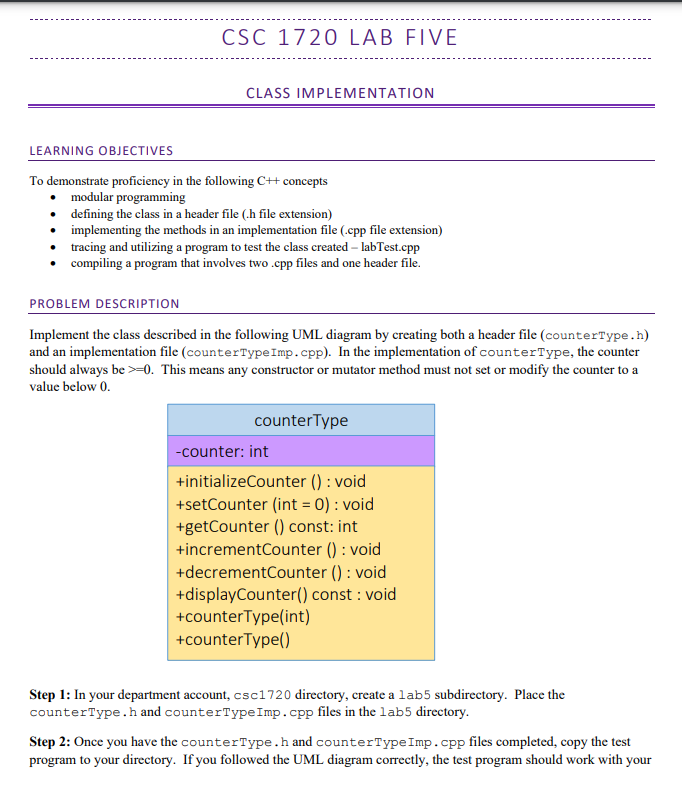
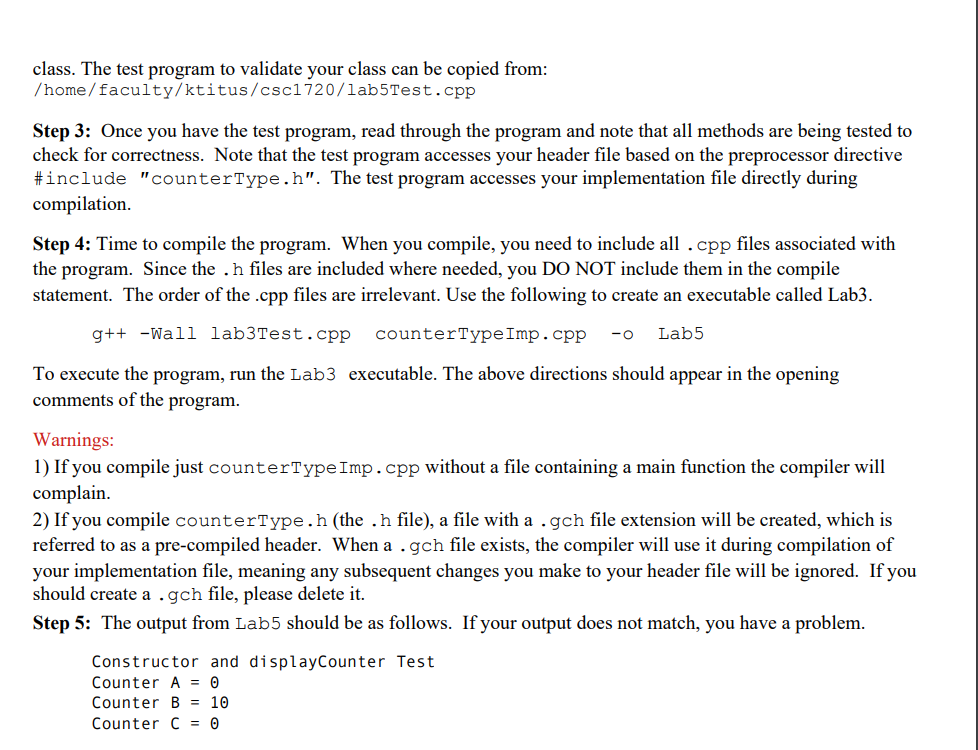
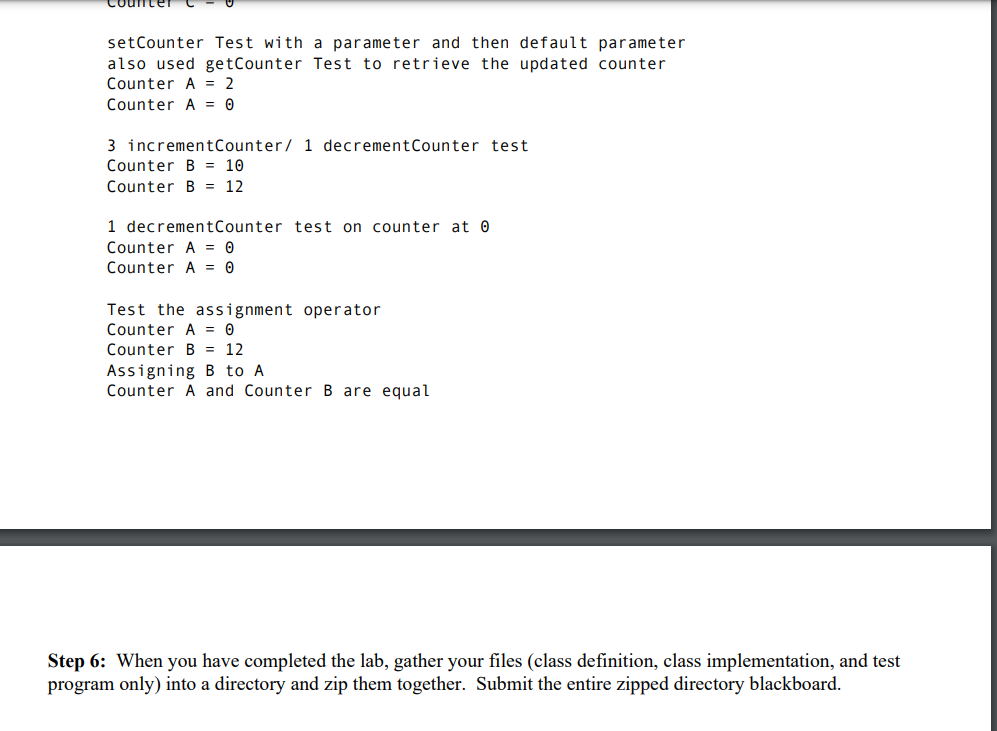
To demonstrate proficiency in the following C++ concepts - modular programming - defining the class in a header file (.h file extension) - implementing the methods in an implementation file (.cpp file extension) - tracing and utilizing a program to test the class created - labTest.cpp - compiling a program that involves two .cpp files and one header file. PROBLEM DESCRIPTION Implement the class described in the following UML diagram by creating both a header file (counterType. h) and an implementation file (counterTypeImp. cpp). In the implementation of counterType, the counter should always be >=0. This means any constructor or mutator method must not set or modify the counter to a value below 0 . Step 1: In your department account, csc1 720 directory, create a lab 5 subdirectory. Place the counterType.h and counterType Imp. cpp files in the lab5 directory. Step 2: Once you have the counterType. h and counterType Imp. cpp files completed, copy the test program to your directory. If you followed the UML diagram correctly, the test program should work with your class. The test program to validate your class can be copied from: /home/faculty/ktitus/csc1720/lab5Test.cpp Step 3: Once you have the test program, read through the program and note that all methods are being tested to check for correctness. Note that the test program accesses your header file based on the preprocessor directive \#include "counterType.h". The test program accesses your implementation file directly during compilation. Step 4: Time to compile the program. When you compile, you need to include all . cpp files associated with the program. Since the . h files are included where needed, you DO NOT include them in the compile statement. The order of the .cpp files are irrelevant. Use the following to create an executable called Lab3. g++ -Wall lab3Test.cpp counterTypeImp.cpp -o Lab5 To execute the program, run the Lab3 executable. The above directions should appear in the opening comments of the program. Warnings: 1) If you compile just counterType Imp. cpp without a file containing a main function the compiler will complain. 2) If you compile counterType.h (the . h file), a file with a gch file extension will be created, which is referred to as a pre-compiled header. When a.gch file exists, the compiler will use it during compilation of your implementation file, meaning any subsequent changes you make to your header file will be ignored. If you should create a.g gh file, please delete it. Step 5: The output from Lab5 should be as follows. If your output does not match, you have a problem. Constructor and displayCounter Test Counter A=0 Counter B=10 Counter C= setCounter Test with a parameter and then default parameter also used getCounter Test to retrieve the updated counter Counter A=2 Counter A=0 3 incrementCounter / 1 decrementCounter test Counter B=10 Counter B=12 1 decrementCounter test on counter at Counter A=0 Counter A=0 Test the assignment operator Counter A=0 Counter B=12 Assigning B to A Counter A and Counter B are equal Step 6: When you have completed the lab, gather your files (class definition, class implementation, and test program only) into a directory and zip them together. Submit the entire zipped directory blackboard. 0i1. tbaker@spock: /csc1720/lab5
Step by Step Solution
There are 3 Steps involved in it

Get step-by-step solutions from verified subject matter experts