

Question: Dont worry about the zip file. Pleas help thanks C language code please. Everything instructions is on the photos I presented. Thank you 2:4 Use
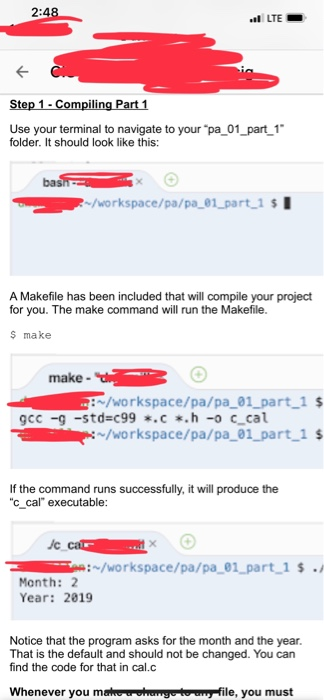
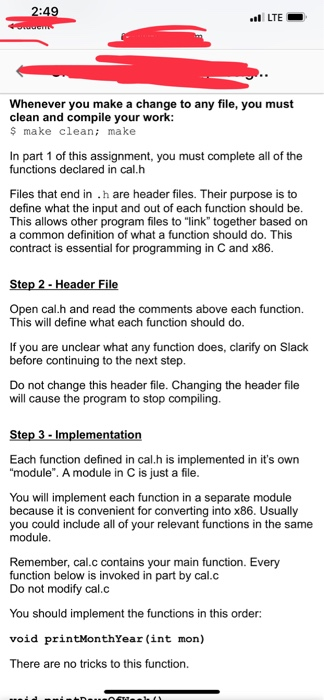
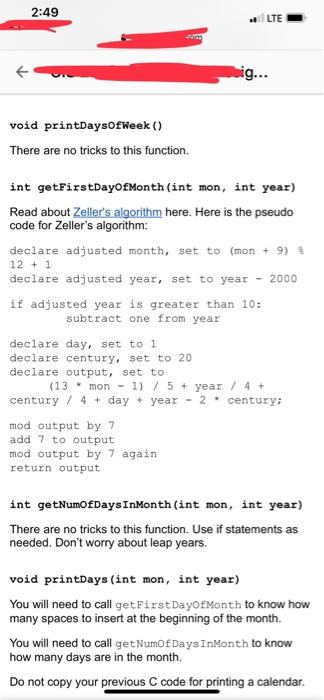
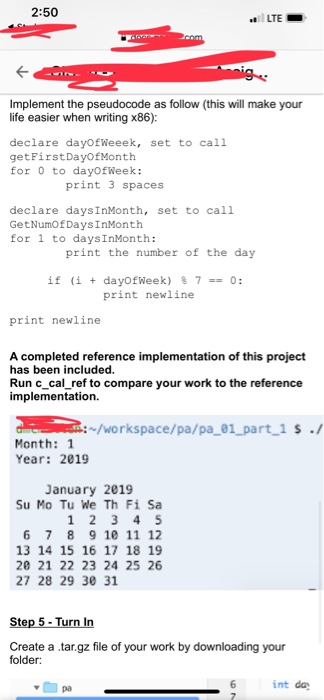
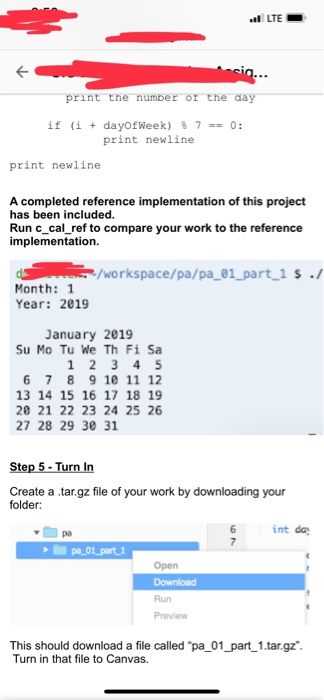
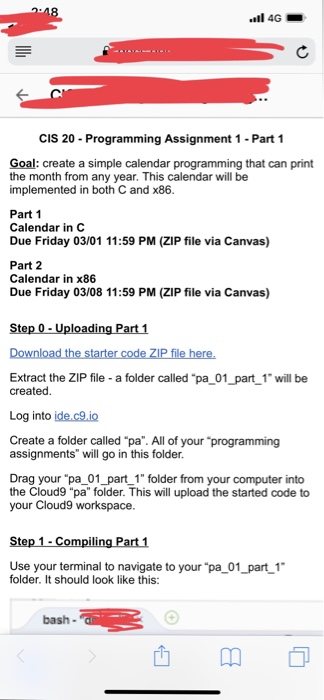
2:4 Use your terminal to navigate to your "pa 01_part 1 folder. It should look like this: ba /workspace/pa/pa61 part 1$ A Makefile has been included that will compile your project for you. The make command will run the Makefile s make make- /workspace/pa/pa 01 part 1 $ gcc -g -std c99.c*.h -o c cal /workspace/pa/pa_01 part 1 $ If the command runs successfully, it will produce the "c cal" executable / Ti e : ~/workspace/pa/pa-01-part-1 $ . Month: 2 Year: 2019 Notice that the program asks for the month and the year That is the default and should not be changed. You can find the code for that in cal.c Whenever you m ahunyetn file, you must 49 LTE Whenever you make a change to any file, you must clean and compile your worlk s make clean; make In part 1 of this assignment, you must complete all of the functions declared in cal.h Files that end in .h are header files. Their purpose is to define what the input and out of each function should be This allows other program files to "link" together based on a common definition of what a function should do. This contract is essential for programming in C and x86 Open cal.h and read the comments above each function. This will define what each function should do If you are unclear what any function does, clarify on Slack before continuing to the next step. Do not change this header file. Changing the header file will cause the program to stop compiling Each function defined in cal.h is implemented in it's own "module". A module in C is just a file You will implement each function in a separate module because it is convenient for converting into x86. Usually you could include all of your relevant functions in the same module Remember, cal.c contains your main function. Every function below is invoked in part by cal.c Do not modify cal.c You should implement the functions in this order: void printMonthYear (int mon) There are no tricks to this function 2:49 LTE. void printDaysofWeek () There are no tricks to this function. int getFirstDayOfMonth (int mon, int year) Read about Zeller's algorithm here. Here is the pseudo code for Zeller's algorithm: declare adjusted month, set to (mon 9) 12 1 declare adjusted year, set to year -2000 if adjusted year is greater than 10: subtract one from year declare day, set to1 declare century, set to 20 declare output, set to (13mon 1 75 year 4+ century/4+ day year 2century: mod output by7 add 7 to output mod output by 7 again return output int getNumOfDaysInMonth (int mon, int year) There are no tricks to this function. Use if statements as needed. Don't worry about leap years. void printDays (int mon, int year) You will need to call getFirstDayOfMonth to know how many spaces to insert at the beginning of the month. You will need to call getNumOfDaysInMonth to know how many days are in the month. Do not copy your previous C code for printing a calendar. 2:50 LTE Implement the pseudocode as follow (this will make your life easier when writing x86): declare dayOfWeeek, set to call getFirstDayOfMonth for 0 to dayofWeek: print 3 spaces declare daysInMonth, set to call GetNumOfDaysInMonth for 1 to daysInMonth: print the number of the day if (i + dayofWeek) % 7-0: print newline print newline A completed reference implementation of this project has been included. Run c_cal_ref to compare your work to the reference implementation. /workspace/pa/pa 01 part 1 s -/ Month: 1 Year: 2019 January 2019 Su Mo Tu We Th Fi Sa 1 2 3 4 5 6 7 8 9 10 11 12 13 14 15 16 17 18 19 20 21 22 23 24 25 26 27 28 29 30 31 te Create a tar.gz file of your work by downloading your folder int da 4G CIS 20 Programming Assignment 1 -Part 1 Goal: create a simple calendar programming that can print the month from any year. This calendar will be implemented in both C and x86 Part 1 Calendar in C Due Friday 03/01 11:59 PM (ZIP file via Canvas) Part 2 Calendar in x86 Due Friday 03/08 11:59 PM (ZIP file via Canvas) Extract the ZIP file - a folder called "pa_01_part 1 will be created Log into ide.c9.io Create a folder called "pa". All of your programming assignments" will go in this folder Drag your "pa 01_ part 1" folder from your computer into the Cloud9 "pa" folder. This will upload the started code to your Cloud9 workspace Use your terminal to navigate to your "pa 01 part 1 folder. It should look like this: bash
Step by Step Solution
There are 3 Steps involved in it

Get step-by-step solutions from verified subject matter experts