

Question: i Need help with this and setting it up you can skip over that part with week3 Create a Repository on GitHub 1. Create your
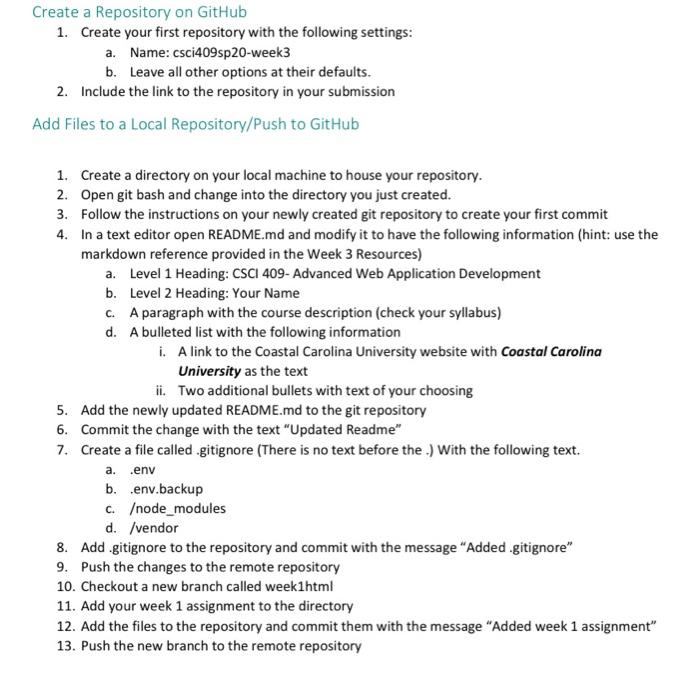
Create a Repository on GitHub 1. Create your first repository with the following settings: a. Name: csci409sp 20-week3 b. Leave all other options at their defaults. 2. Include the link to the repository in your submission Add Files to a Local Repository/Push to GitHub 1. Create a directory on your local machine to house your repository. 2. Open git bash and change into the directory you just created. 3. Follow the instructions on your newly created git repository to create your first commit 4. In a text editor open README.md and modify it to have the following information (hint: use the markdown reference provided in the Week 3 Resources) a. Level 1 Heading: CSCI 409- Advanced Web Application Development b. Level 2 Heading: Your Name C. A paragraph with the course description (check your syllabus) d. A bulleted list with the following information i. A link to the Coastal Carolina University website with Coastal Carolina University as the text ii. Two additional bullets with text of your choosing 5. Add the newly updated README.md to the git repository 6. Commit the change with the text "Updated Readme" 7. Create a file called .gitignore (There is no text before the. With the following text. a. env b. .env.backup c.ode_modules d. /vendor 8. Add .gitignore to the repository and commit with the message "Added.gitignore" 9. Push the changes to the remote repository 10. Checkout a new branch called weekihtml 11. Add your week 1 assignment to the directory 12. Add the files to the repository and commit them with the message "Added week 1 assignment" 13. Push the new branch to the remote repository
Step by Step Solution
There are 3 Steps involved in it

Get step-by-step solutions from verified subject matter experts