

Question: Look at the load vs deflection diagram shown below for a bridge girder. For each of the following cases show using arrows the load -
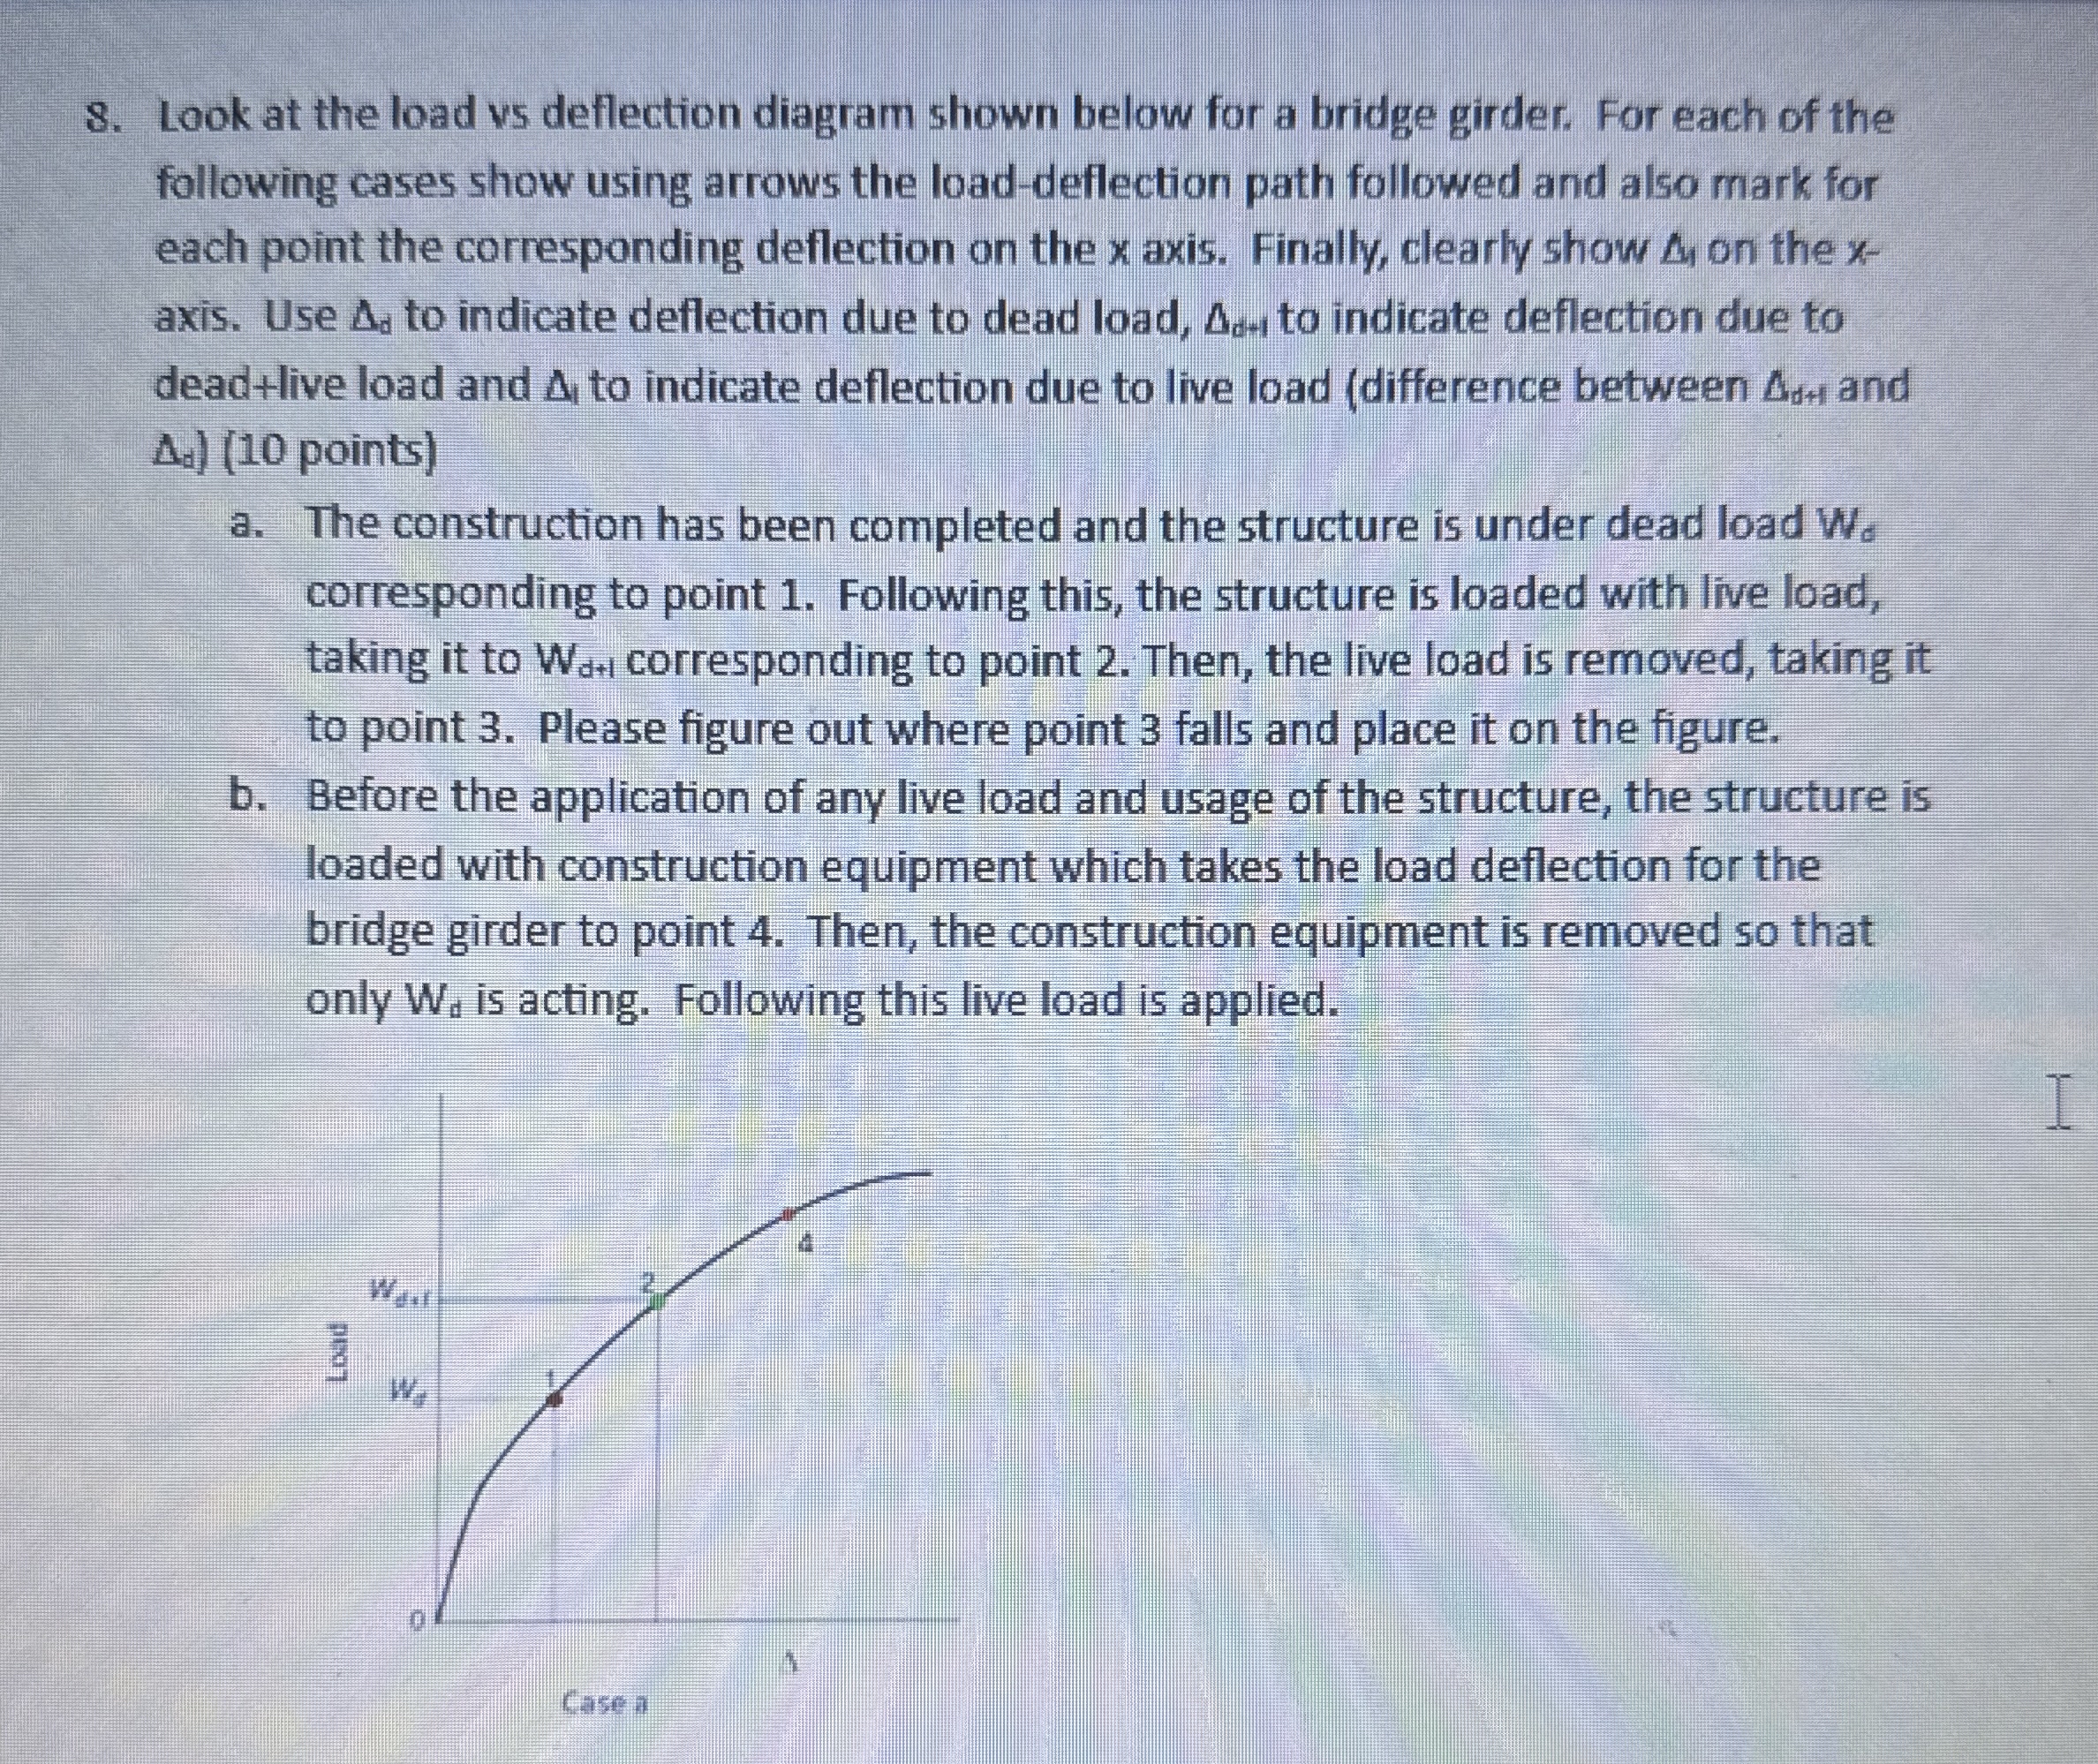
Look at the load vs deflection diagram shown below for a bridge girder. For each of the following cases show using arrows the loaddeflection path followed and also mark for each point the corresponding deflection on the axis. Finally, clearly show on the axis. Use to indicate deflection due to dead load, to indicate deflection due to deadlive load and to indicate deflection due to live load difference between and points
a The construction has been completed and the structure is under dead load corresponding to point Following this, the structure is loaded with live load, taking it to corresponding to point Then, the live load is removed, taking it to point Please figure out where point falls and place it on the figure.
b Before the application of any live load and usage of the structure, the structure is loaded with construction equipment which takes the load deflection for the bridge girder to point Then, the construction equipment is removed so that only is acting. Following this live load is applied.
Case a
Step by Step Solution
There are 3 Steps involved in it
1 Expert Approved Answer
Step: 1 Unlock

Question Has Been Solved by an Expert!
Get step-by-step solutions from verified subject matter experts
Step: 2 Unlock
Step: 3 Unlock