

Question: Problem 3: As this section of the IDEA tutorial addresses importing files, your next task will be to import a print report file. We will
Problem 3:As this section of the IDEA tutorial addresses importing files, your next task will be to import a print report file. We will use this file later in our tutorial, so do not delete the database once created. The file name is "Travel Report." In order to import the Travel Report file, open IDEA. Click on the Home tab, and then in the Import group, select Desktop. Select Print Report and Adobe PDF from the list in the Import Assistant, and then in the File name box browse to the file "Travel_report.prn". This file is located in the path Documents>My Idea Documents>IDEA projects>Tutorial>Source Files.ILB. Once you have selected the file, select Open, and then click Next. The file will then open in the report reader.
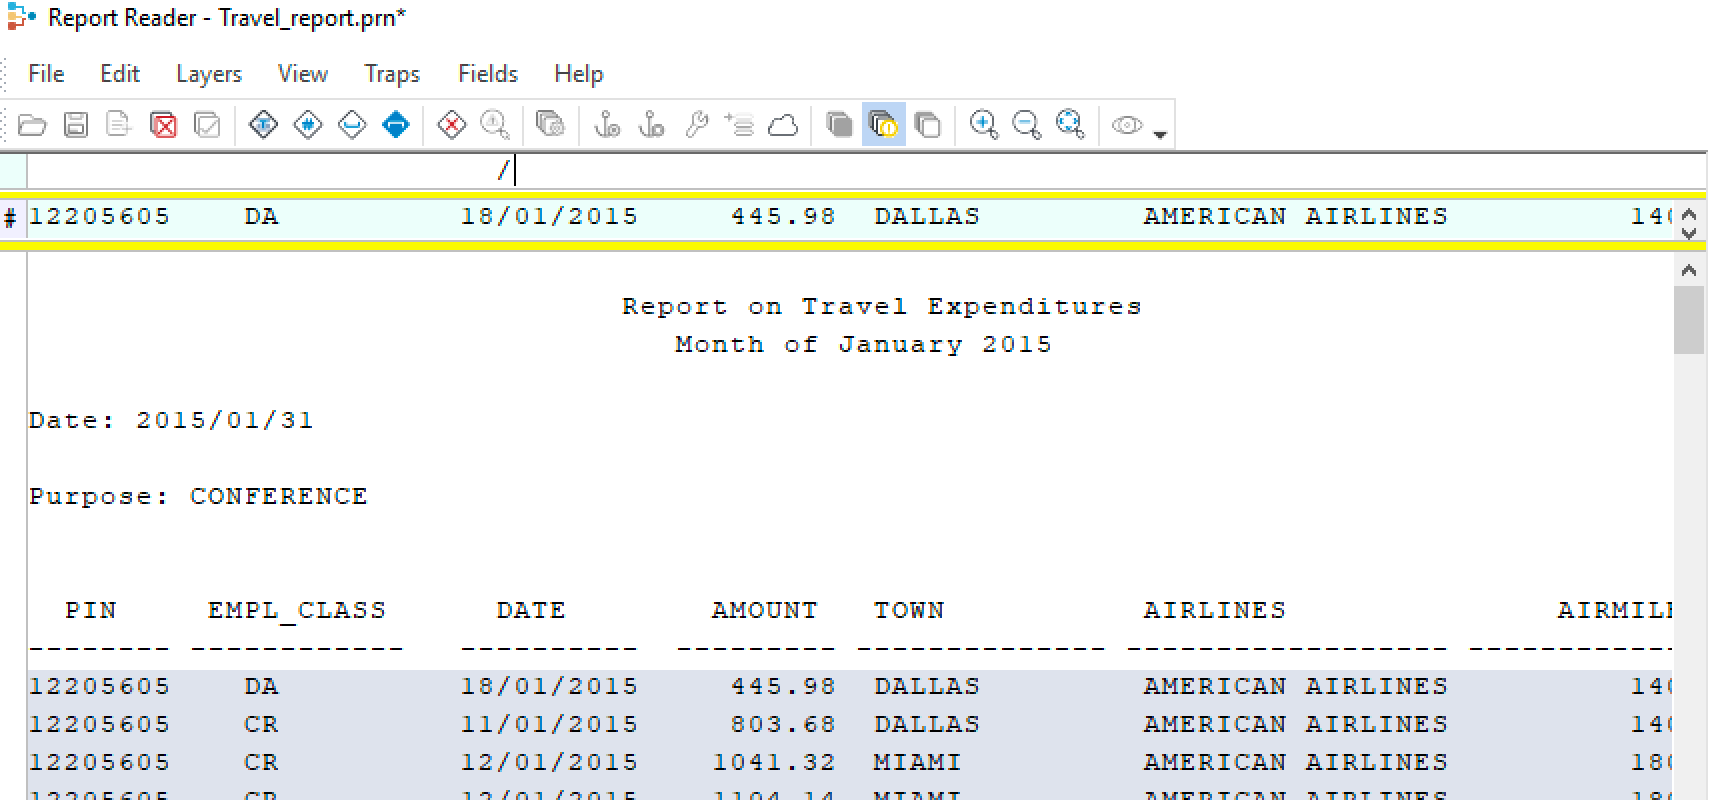
To use the Travel Report in IDEA, we must now import the individual lines of data, but not the file header information. To begin this process, select the first line of the report below the column headers (please note: when selecting a row, you may have to drag the row a bit to get it to select). Once selected, the row will turn black, and a dialogue box will appear that asks "What do you want to do with the sample line(s)?" Select Create a standard layer and click Yes.
Once you click yes, a colored row will appear at the top of the report. This row is where you will create and define the "standard layer," which includes all the data you wish to work with. First you must define what IDEA calls a "trap." The trap will capture all the rows of data you want to include in your import. To set a trap, pick a character in the colored row that is present in each row of data you want to include in the report but that is fairly uncommon in the data file. If a date is used in each line, the forward slash "/" character is often a good trap. In order to set the trap, click in the blank space directly above the character you have decided to use in the colored row. Then type the character you have decided to use. See screenshot illustration.
Step by Step Solution
There are 3 Steps involved in it

Get step-by-step solutions from verified subject matter experts