

Question: Show me step by step on how to do this please. shown below in Figure 1 . 3 . 2 . 2 . Record the
Show me step by step on how to do this please. shown below in Figure
Record the and machine coordinates as you "touch off" with the edge
finder.
Remember to compensate for the edge finder by adding or subtracting the
edge finder radius appropriately.
Record the final machine coordinates for G
Neatly type a stepbystep procedure to for all the steps required to complete the
lab, including what buttons you pressed and what screen menus you navigated.
Include photo where appropriate.
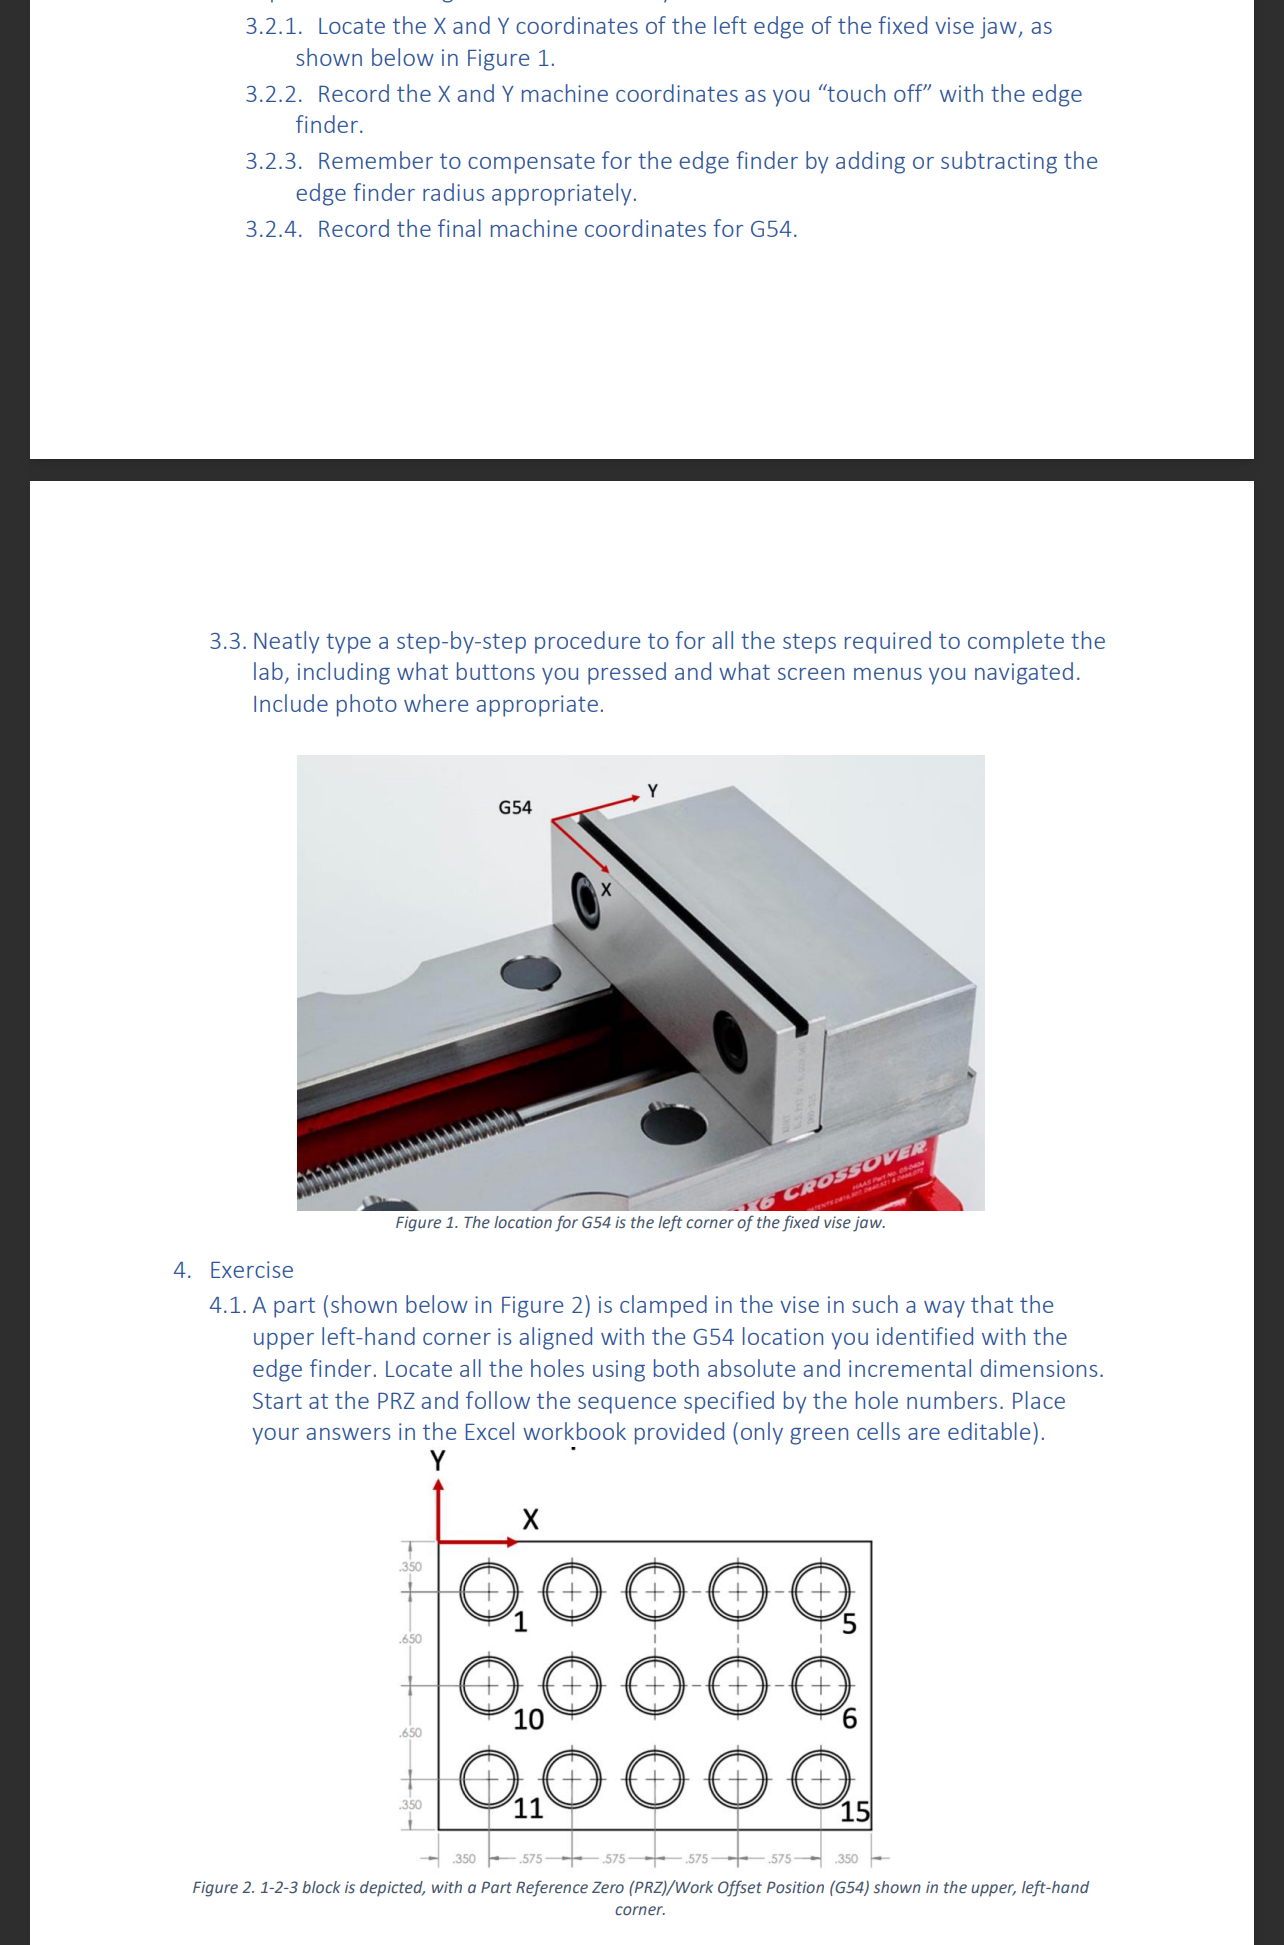
Exercise
A part shown below in Figure is clamped in the vise in such a way that the
upper lefthand corner is aligned with the G location you identified with the
edge finder. Locate all the holes using both absolute and incremental dimensions.
Start at the PRZ and follow the sequence specified by the hole numbers. Place
your answers in the Excel workbook provided only green cells are editable Use the machine coordinates you recorded while defining the PRZG with the edge finder to calcuate the X and Y machine coordinates for all points.
Step by Step Solution
There are 3 Steps involved in it
1 Expert Approved Answer
Step: 1 Unlock

Question Has Been Solved by an Expert!
Get step-by-step solutions from verified subject matter experts
Step: 2 Unlock
Step: 3 Unlock