

Question: spectives Access 3 6 5 / 2 0 2 1 Module I: SAM Project la Global Human Resources Consultants CREATING AND MODIFYING TABLES AND OTHER
spectives Access
Module I: SAM Project la
Global Human Resources Consultants
CREATING AND MODIFYING TABLES AND OTHER DATABASE OBJECTS
GETTING STARTED
Open the file NPACaFirstLastNameaccdb, available for
Save the file NPACaFirstLastNameaccdb as NPACaFirstLastNameaccdb
Edit the file name by changing to
If you do not see the accdb file extension, do not type it The file exte be added for you automatically.
With the file NPACaFirstLastNameaccdb open, ensure first and last name is displayed as the first record in the GradingInfoTable to
If the table does not display your name, delete the file and download a
PROJECT STEPS
You are a project manager for Global Human Resources Consultants, an orga that provides human resources services to emerging companies located in ea Europe. To better manage consultants and the projects on which they work, decided to create an Access database.
Create a new table in Datasheet View with the following options:
a Rename the default primary key ID field CountryCode and change the to Short Text.
b Change the field size of the field to
c Add a new field with the name CountryName and the Short Text dat Save the table, using Country as the new name.
With the Country table still open in Datasheet View, add the four records she Save and close the Country table.
Table : New Records for Country Table
tableCountryCodeCountryNameBELBelarusBGRBulgariaROURomaniaSRBSerbia
tives Access
I Module I: SAM Project la
New Perspectives Access Module : SAM Project la
Create a new table in Design View to store the clients of Global as follows:
a Add a field with the name ClientID and the AutoNumber data type.
b Apply ClientID as the table's primary key.
Save the table with the name Client but do not close it
With the Client table still open in Design View, add a second field to the table with the field name ClientName and the Short Text data type. Save the table and then close it
Open the Consultant table in Design view and update the Last field, using LastName as the new value.
With the Consultant table still open in Design View, change the data type property for the ConsultantID field from Number to Short Text.
In Design View, add a new field to the Consultant table after the LastName field. The field should be named StartDate and have the DateTime data type. Save and close the Consultant table.
Open the Consultant table in Datasheet View, navigate to the seventh record which has a ConsultantID field value of and delete the record.
With the Consultant table still open in Datasheet View, navigate to the fourth record which has a ConsultantID field value of and update the FirstName record, using Sidney as the new value. Close the Consultant table.
You also need to view individual consultant records. Use the Form Wizard to create a form for the Consultant table with the following options:
a Include all fields from the Consultant table in the form.
b Select Columnar as the layout for the form.
Save the form with the name Consultant Data Form and confirm that the form matches Figure Close the form.
Altemative Formats
up
Nettutor
Cloudy
New Perspectives Access Module I: SAM Project la
Use the Simple Query Wizard to create a query based on the Skill table with the following options:
a Include all fields from the Skill table in the query.
Save the query with the name Skill Query which is the default name and then close the query.
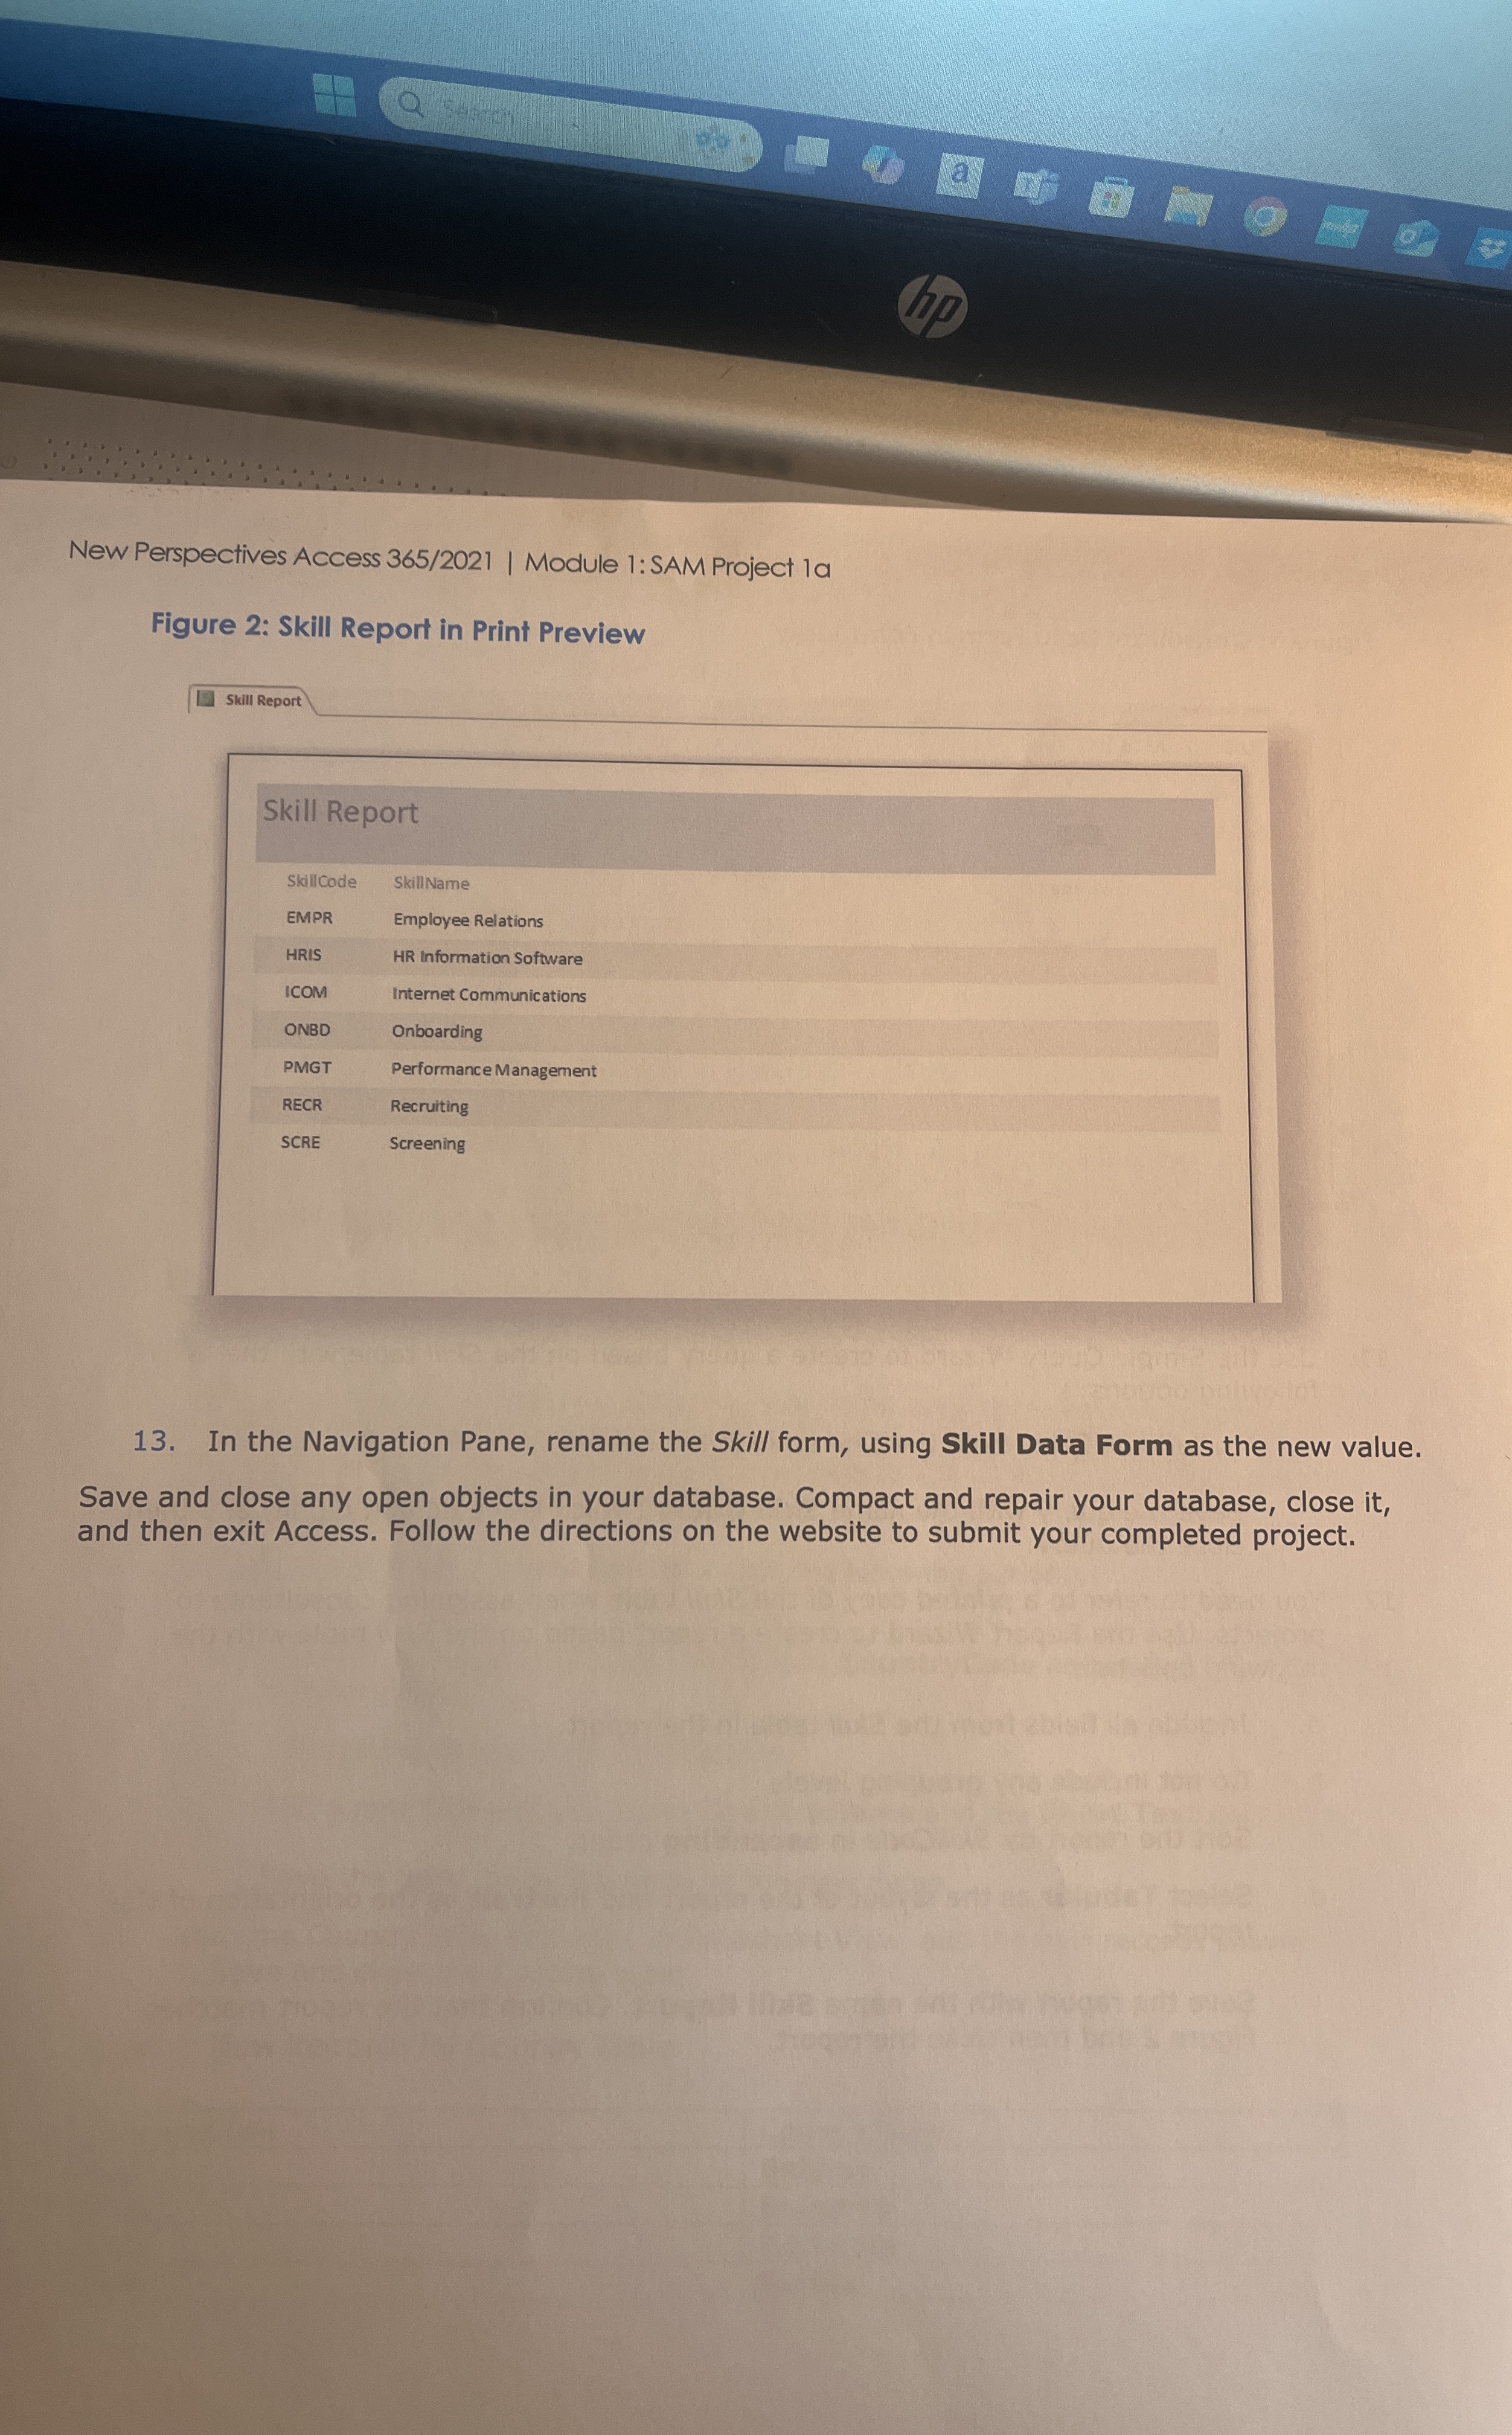
You need to refer to a printed copy of the Skill table when assigning consultants to projects. Use the Report Wizard to create a report based on the Skill table with the following options:
a Include all fields from the Skill table in the report.
b Do not include any grouping levels.
c Sort the report by SkillCode in ascending order.
d Select Tabular as the layout of the report and Portrait as the orientation of the report.
Save the report with the name Skill Report. Confirm that the report matches Figure and then close the report.
New Perspectives Access Module : SAM Project la
Figure : Skill Report in Print Preview
tableSkill ReportSkillcodeSkill NameEMPREmployee RelationsHRISHR Information SoftwareICOMInternet CommunicationsONBDOnboardingPMGTPerformance ManagementRECRRecruitingSCREScreening
In the Navigation Pane, rename the Skill form, using Skill Data Form as the new value.
Save and close any open objects in your database. Compact and repair your database, close it and then exit Access. Follow the directions on the website to submit your completed project.
Step by Step Solution
There are 3 Steps involved in it
1 Expert Approved Answer
Step: 1 Unlock

Question Has Been Solved by an Expert!
Get step-by-step solutions from verified subject matter experts
Step: 2 Unlock
Step: 3 Unlock