

Question: ARDUINO/PROTEUS HELP! When I click any key, why does my 7-segment display won't display correctly? It only displays one or two LEDs, which is wrong.
ARDUINO/PROTEUS HELP! When I click any key, why does my 7-segment display won't display correctly? It only displays one or two LEDs, which is wrong. Is there something wrong with my code or my pins? Please help me. Your explanation will be helpful!. CODE:
#include
const byte ROWS = 4; // Number of rows in the keypad const byte COLS = 3; // Number of columns in the keypad
char keys[ROWS][COLS] = { {'1', '2', '3'}, {'4', '5', '6'}, {'7', '8', '9'}, {'*', '0', '#'} };
byte rowPins[ROWS] = {9, 8, 7, 6}; // Keypad row pins byte colPins[COLS] = {5, 4, 3}; // Keypad column pins
Keypad keypad = Keypad(makeKeymap(keys), rowPins, colPins, ROWS, COLS);
const byte segmentA = 10; const byte segmentB = 11; const byte segmentC = 12; const byte segmentD = 13; const byte segmentE = A0; const byte segmentF = A1; const byte segmentG = A2;
const byte digit1 = A3; const byte digit2 = A4;
void setup() { pinMode(segmentA, OUTPUT); pinMode(segmentB, OUTPUT); pinMode(segmentC, OUTPUT); pinMode(segmentD, OUTPUT); pinMode(segmentE, OUTPUT); pinMode(segmentF, OUTPUT); pinMode(segmentG, OUTPUT); pinMode(digit1, OUTPUT); pinMode(digit2, OUTPUT); digitalWrite(digit1, HIGH); digitalWrite(digit2, HIGH); }
void loop() { char key = keypad.getKey(); // Read the keypad if (key != NO_KEY) { // Display the key on the 7-Segment display if (key == '#') { // Display the letter "H" digitalWrite(segmentA, HIGH); digitalWrite(segmentB, HIGH); digitalWrite(segmentC, HIGH); digitalWrite(segmentD, HIGH); digitalWrite(segmentE, HIGH); digitalWrite(segmentF, HIGH); digitalWrite(segmentG, LOW); } else if (key == '*') { // Display the letter "A" digitalWrite(segmentA, HIGH); digitalWrite(segmentB, HIGH); digitalWrite(segmentC, LOW); digitalWrite(segmentD, HIGH); digitalWrite(segmentE, HIGH); digitalWrite(segmentF, HIGH); digitalWrite(segmentG, HIGH); } else { // Display the key int num = key - '0'; digitalWrite(segmentA, (num & 0x01) ? HIGH : LOW); digitalWrite(segmentB, (num & 0x02) ? HIGH : LOW); digitalWrite(segmentC, (num & 0x04) ? HIGH : LOW); digitalWrite(segmentD, (num & 0x08) ? HIGH : LOW); digitalWrite(segmentE, (num & 0x10) ? HIGH : LOW); digitalWrite(segmentF, (num & 0x20) ? HIGH : LOW); digitalWrite(segmentG, (num & 0x40) ? HIGH : LOW); } // Display the key on the first digit of the 7-Segment display digitalWrite(digit1, LOW); digitalWrite(digit2, HIGH); delay(5); // Display the key on the second digit of the 7-Segment display digitalWrite(digit1, HIGH); digitalWrite(digit2, LOW); delay(5); } } CIRCUIT DIAGRAM: 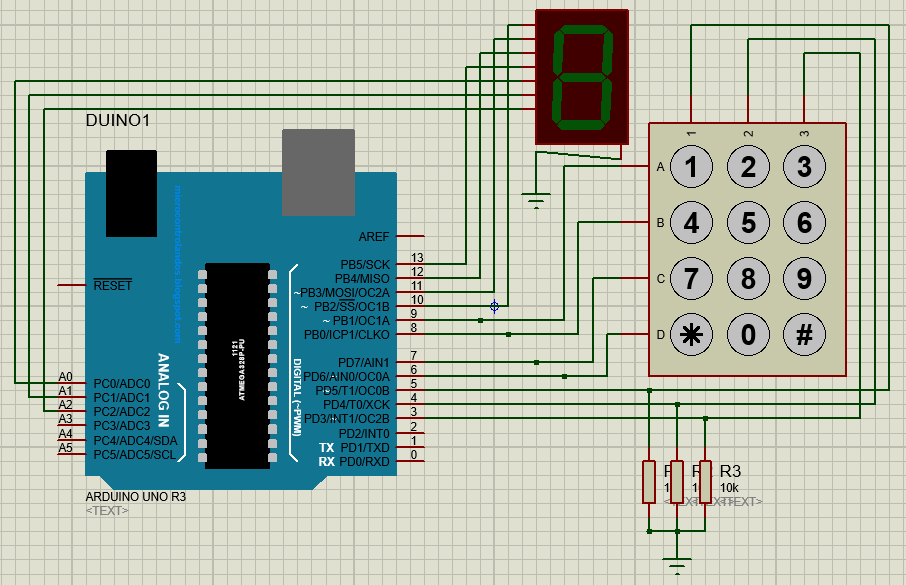
ERROS: 
SOME LEDS: 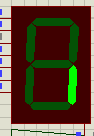
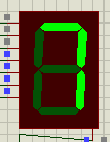
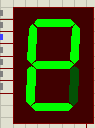 6 is pressed; 7 is pressed; Asterisk* is pressed.
1) Logic contention(s) detected on net $00009. 1) Logic contention(s) detected on net $00005. 1) Logic contention(s) detected on net $00008. 1) Logic contention(s) detected on net $00007. 1) Logic contention(s) detected on net $00004. 1) Logic contention(s) detected on net \#00006. 1) Logic contention(s) detected on net $00003. E E
Step by Step Solution
There are 3 Steps involved in it

Get step-by-step solutions from verified subject matter experts