

Question: Create a web app using css and java that uses similar code and displays the images as seen on the screen shots using chrome as

Create a web app using css and java that uses similar code and displays the images as seen on the screen shots using chrome as web browser. Name on display should be John Doe for any personal names.
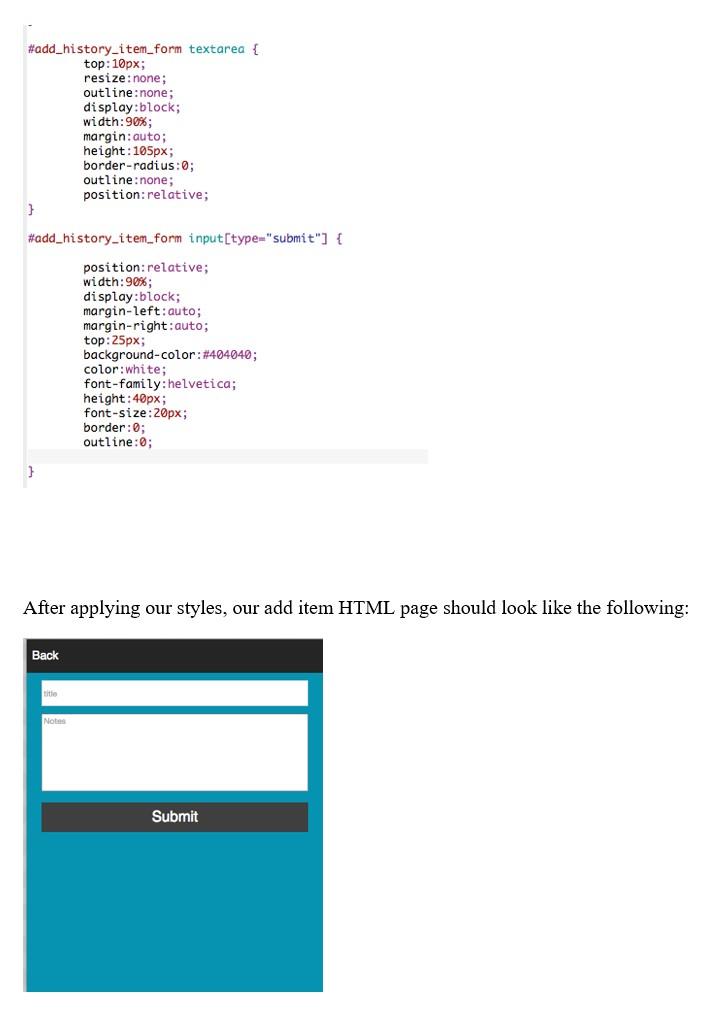
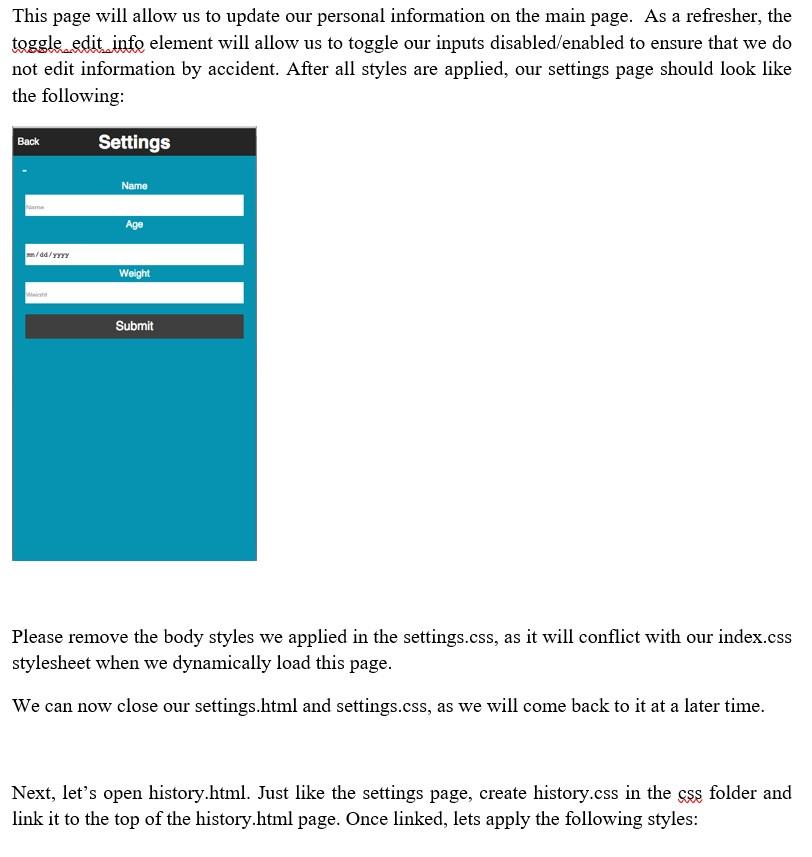
Our index.html page should now look like the following: Daniel Nasello 11/25/1986 27 yrs old 333 lbs This completes our styles for our main page. As mentioned before, we will dynamically load CSS into separate style sheets in order to maintain code and decrease loading times for our pages. Let's close index.html and index.css and open our settings.html page. First, let's create the settings.css file in our css folder, and link it on the top of our settings.html page. Traditionally, we would link css files in the head of our document, and this would be bad #add_history_item_form textarea { top: 10px; resize: none; outline: none; display:block; width:90%; margin: auto; height: 105px; border-radius: 0; outline: none; position:relative; } #add_history_item_form input[type="submit") { position:relative; width:90%; display:block; margin-left: auto; margin-right:auto; top:25px; background-color: #404040; color: white; font-family:helvetica; height:40px; font-size:20px; border:0; outline:0; } After applying our styles, our add item HTML page should look like the following: Back title Notes Submit This page will allow us to update our personal information on the main page. As a refresher, the toggle_edit_info element will allow us to toggle our inputs disabled/enabled to ensure that we do not edit information by accident. After all styles are applied, our settings page should look like the following: Back Settings Name Age mm/dd/YYYY Weight Submit Please remove the body styles we applied in the settings.css, as it will conflict with our index.css stylesheet when we dynamically load this page. We can now close our settings.html and settings.css, as we will come back to it at a later time. Next, let's open history.html. Just like the settings page, create history.css in the css folder and link it to the top of the history.html page. Once linked, lets apply the following styles: Our index.html page should now look like the following: Daniel Nasello 11/25/1986 27 yrs old 333 lbs This completes our styles for our main page. As mentioned before, we will dynamically load CSS into separate style sheets in order to maintain code and decrease loading times for our pages. Let's close index.html and index.css and open our settings.html page. First, let's create the settings.css file in our css folder, and link it on the top of our settings.html page. Traditionally, we would link css files in the head of our document, and this would be bad #add_history_item_form textarea { top: 10px; resize: none; outline: none; display:block; width:90%; margin: auto; height: 105px; border-radius: 0; outline: none; position:relative; } #add_history_item_form input[type="submit") { position:relative; width:90%; display:block; margin-left: auto; margin-right:auto; top:25px; background-color: #404040; color: white; font-family:helvetica; height:40px; font-size:20px; border:0; outline:0; } After applying our styles, our add item HTML page should look like the following: Back title Notes Submit This page will allow us to update our personal information on the main page. As a refresher, the toggle_edit_info element will allow us to toggle our inputs disabled/enabled to ensure that we do not edit information by accident. After all styles are applied, our settings page should look like the following: Back Settings Name Age mm/dd/YYYY Weight Submit Please remove the body styles we applied in the settings.css, as it will conflict with our index.css stylesheet when we dynamically load this page. We can now close our settings.html and settings.css, as we will come back to it at a later time. Next, let's open history.html. Just like the settings page, create history.css in the css folder and link it to the top of the history.html page. Once linked, lets apply the following styles
Step by Step Solution
There are 3 Steps involved in it

Get step-by-step solutions from verified subject matter experts