

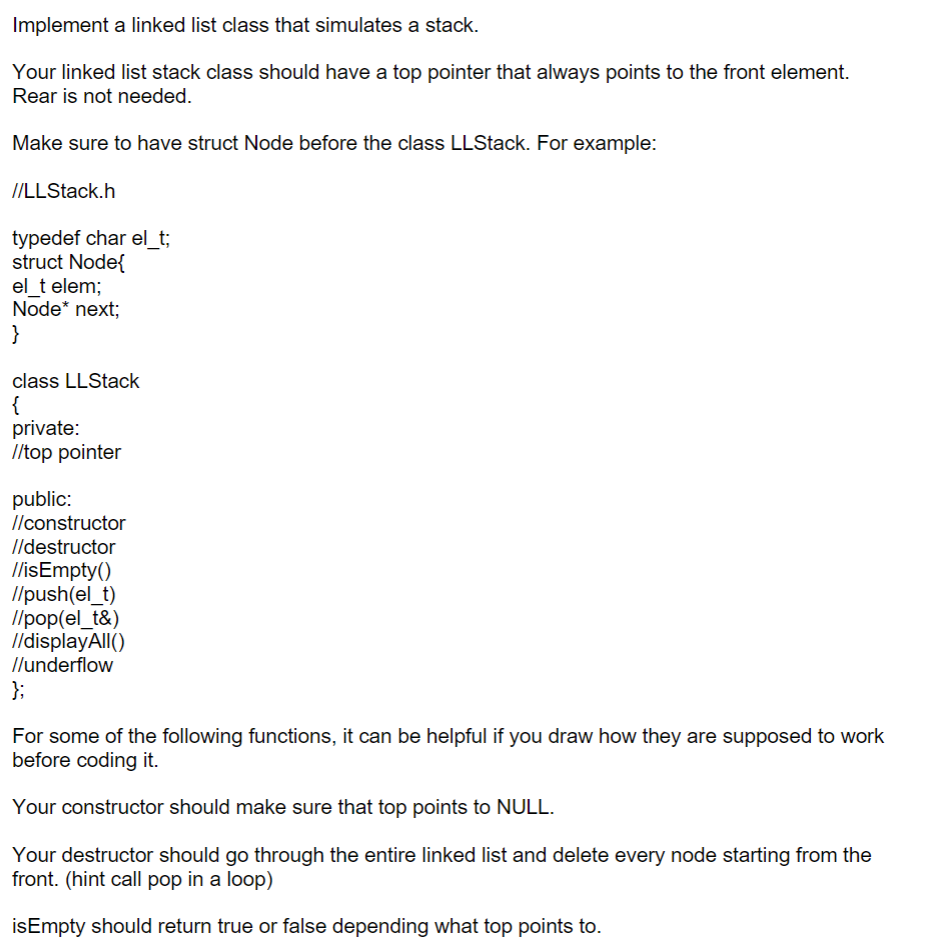
Question: Implement a linked list class that simulates a stack. Your linked list stack class should have a top pointer that always points to the front
Implement a linked list class that simulates a stack.
Your linked list stack class should have a top pointer that always points to the front element.
Rear is not needed.
Make sure to have struct Node before the class LLStack. For example:
LLStackh
typedef char elt;
struct Node
elt elem;
Nde next;
class LLStack
private:
top pointer
public:
constructor
destructor
isEmpty
pushelt
popelt&
displayAll
underflow
;
For some of the following functions, it can be helpful if you draw how they are supposed to work before coding it
Your constructor should make sure that top points to NULL.
Your destructor should go through the entire linked list and delete every node starting from the front. hint call pop in a loop
isEmpty should return true or false depending what top points to Push is going to act similarly to addFront in the notes NotesIqueue. It will add a node to the front of the linked list and not return anything. Hint: You need to create a new node
Pop is going to act similarly as deleteFront in notes NotesIqueue. There is no rear here so no need to consider the special case. Make sure to throw underflow if empty. Pop only returns the element using pass by reference and nothing else will be returned.
displayAll should output every element inside of the linked list, starting from top, in a vertical line. It will not change anything, nor will it return anything. If there is nothing in the stack make sure to output EMPTY code that will give you the following output:
Here is what the output should look like:
Stack looks like:
EMPTY
adding a and b to stack
Stack looks like:
b
a
removing top element
Stack looks like:
a
adding c and d to stack
Stack looks like:
d
c
a
calling destructor...
Process exited after seconds with return value
Press any key to continue
Step by Step Solution
There are 3 Steps involved in it
1 Expert Approved Answer
Step: 1 Unlock

Question Has Been Solved by an Expert!
Get step-by-step solutions from verified subject matter experts
Step: 2 Unlock
Step: 3 Unlock