

Question: Part C: Simulate Drive Failures Important: To prevent having to build array parity multiple times, ensure that you gather all the information once your array
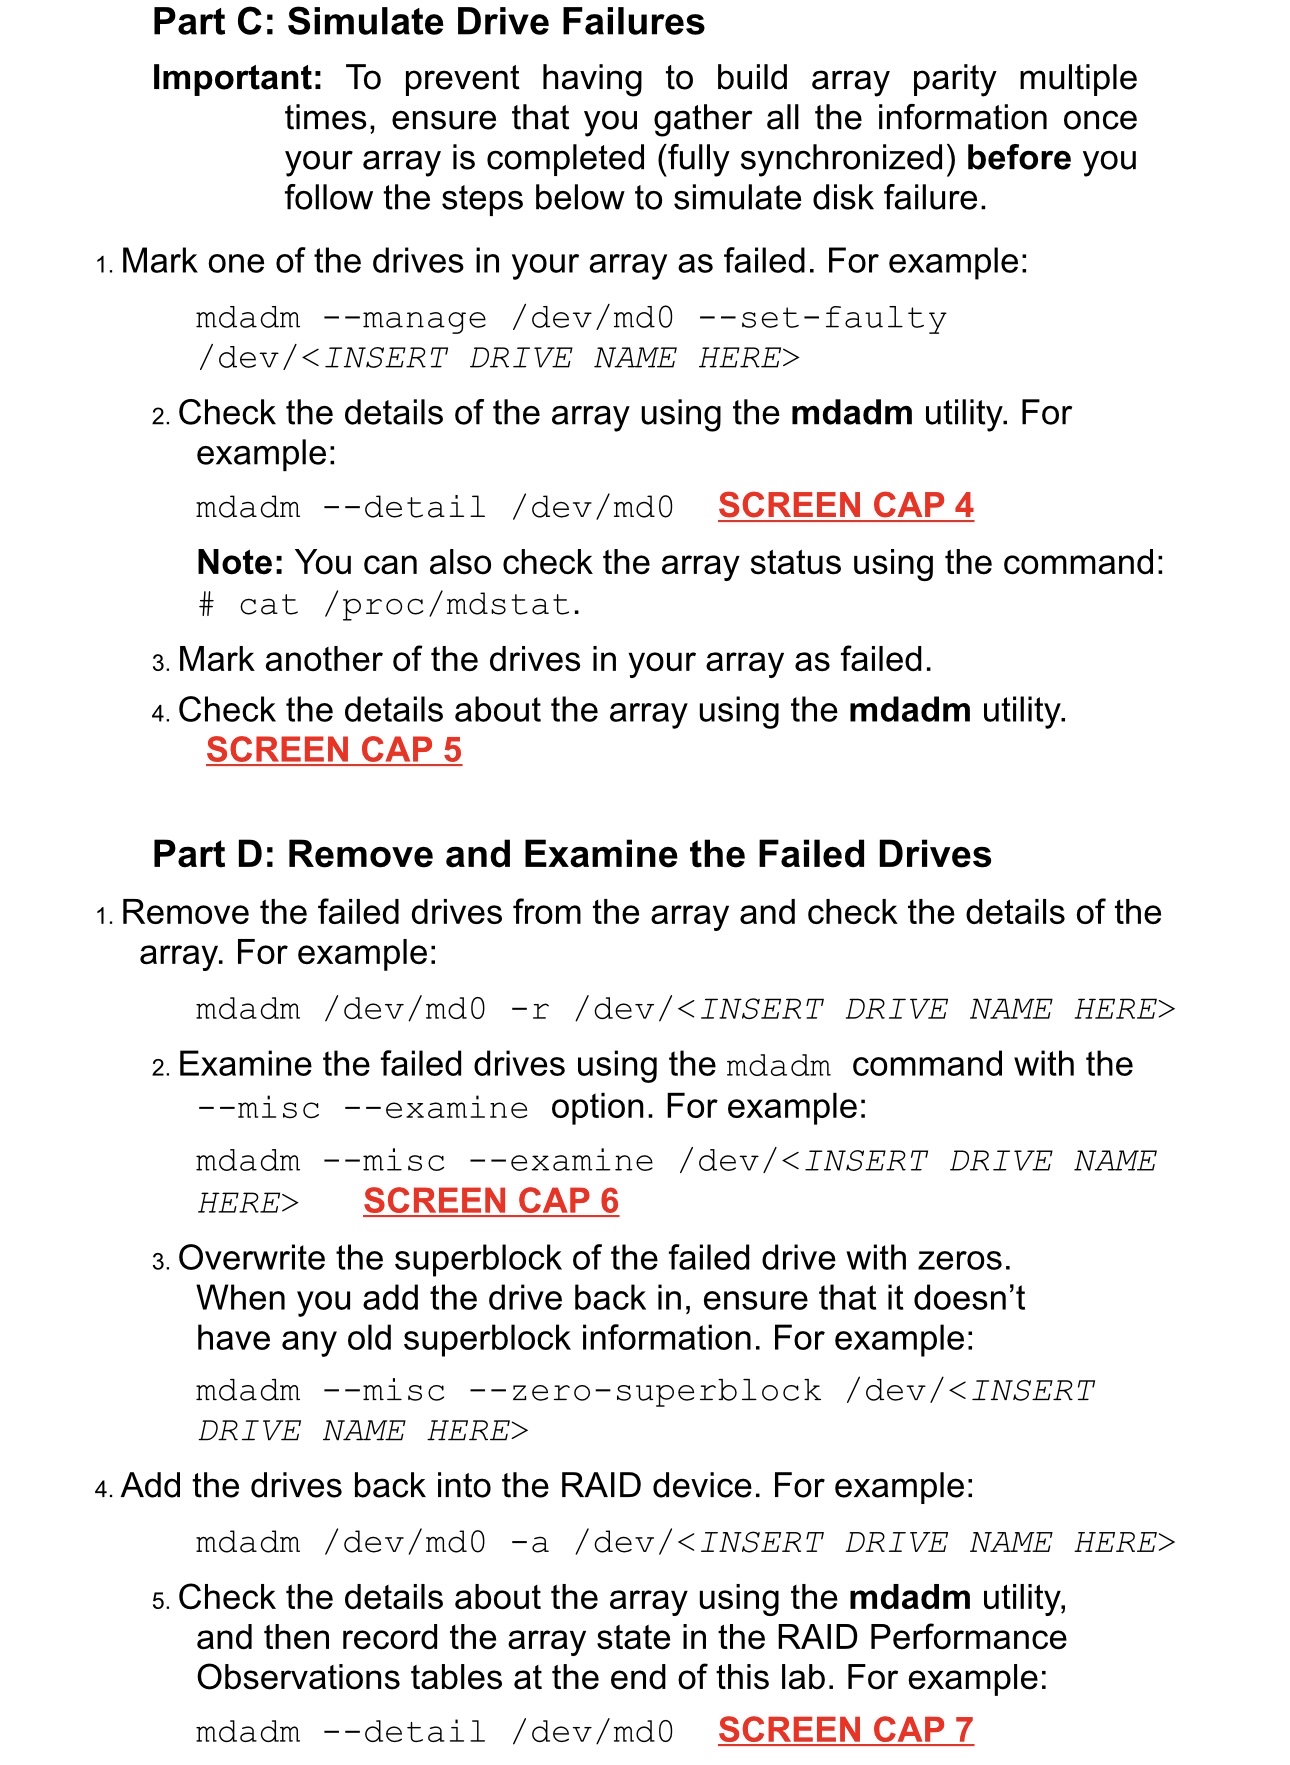
Part C: Simulate Drive Failures
Important: To prevent having to build array parity multiple times, ensure that you gather all the information once your array is completed fully synchronized before you follow the steps below to simulate disk failure.
Mark one of the drives in your array as failed. For example:
mdadm manage devmdsetfaulty
HERERIVE NAME HERE
Check the details the array using the mdadm utility. For example:
mdadm detail SCREEN CAP
Note: You can also check the array status using the command: # dstat.
Mark another the drives your array failed.
Check the details about the array using the mdadm utility. SCREEN CAP
Part : Remove and Examine the Failed Drives
Remove the failed drives from the array and check the details the array. For example:
mdadm
Examine the failed drives using the mdadm command with the misc examine option. For example:
mdadm misc examinERE SCREEN CAP
Overwrite the superblock of the failed drive with zeros. When you add the drive back in ensure that it doesn't have any old superblock information. For example:
mdadm misc zerosuperblock dev
Step by Step Solution
There are 3 Steps involved in it
1 Expert Approved Answer
Step: 1 Unlock

Question Has Been Solved by an Expert!
Get step-by-step solutions from verified subject matter experts
Step: 2 Unlock
Step: 3 Unlock