

Question: Part III1. Go to the Physics Classroom Image Builder Simulationhttps://www.physicsclassroom.com/Physics-Interactives/Reflection-and-Mirrors/Name-That-Image/Name-That-Image-Interactive2. Choose four objects to analyze. At least one must be on the left side of
Part III1. Go to the Physics Classroom Image Builder Simulationhttps://www.physicsclassroom.com/Physics-Interactives/Reflection-and-Mirrors/Name-That-Image/Name-That-Image-Interactive2. Choose four objects to analyze. At least one must be on the left side of the mirror and one on the right.3. Identify the blue arrow that represents the image formed by the object (red arrow). 4. When correctly identified, click on the View Ray Diagram button.5. Explain why the image appears in the location that it does.Part IFor one situation, correctly identify the location of each image and whether or not the student can be seen by the observer. Explain, using the Law of Reflection why this is true. Upload a screenshot of your situation and correct answers.Part IIUpload a screenshot of three correctly identified images with an explanation of the location, size, and type of each one.Part IIIUpload a screenshot of four correctly identified images with the ray diagrams. Explain why the image appears in the location where it does and why it is larger, smaller, or the same size as the object. Explain whether the image is virtual or real.
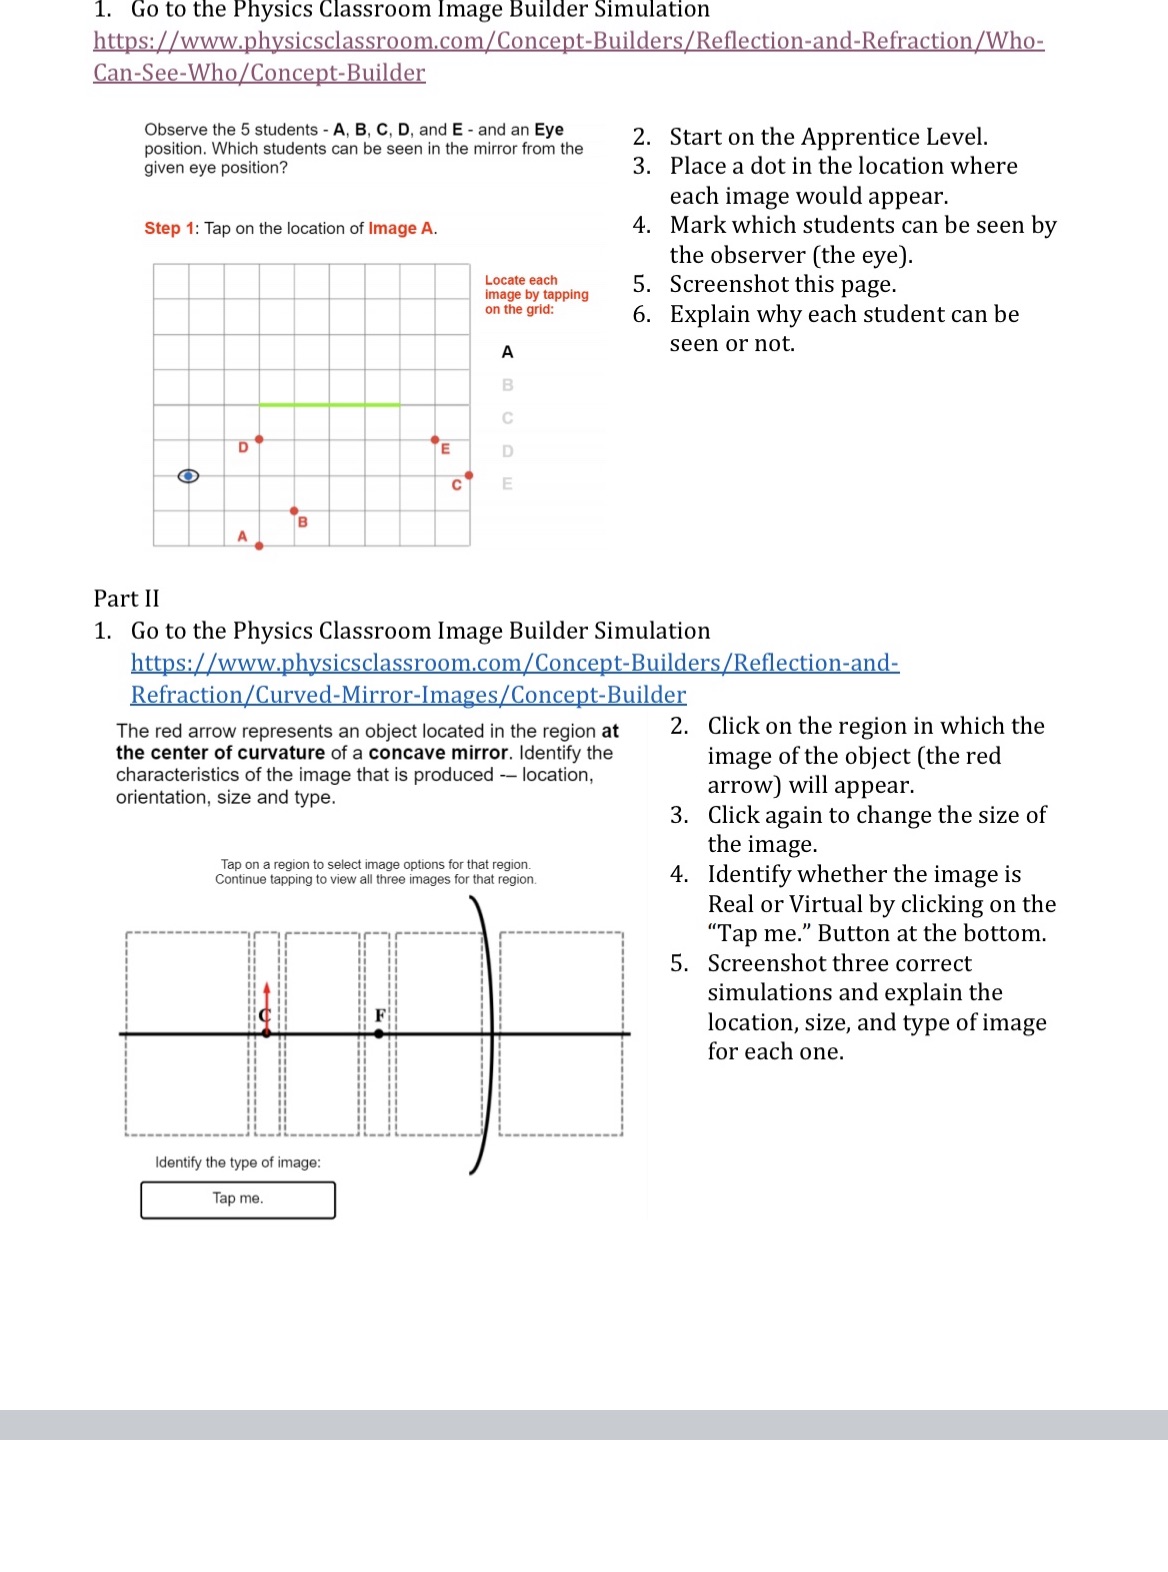
Go to the Physics Classroom Image Builder Simulation https://www.physicsclassroom.com/Concept-Builders/Reflection-and-Refraction/Who- Can-See-Who/Concept-Builder Observe the 5 students - A, B, C, D, and E - and an Eye position. Which students can be seen in the mirror from the 2. Start on the Apprentice Level. given eye position? 3. Place a dot in the location where each image would appear. Step 1: Tap on the location of Image A. 4. Mark which students can be seen by the observer (the eye). Locate each image by tapping 5. Screenshot this page. on the grid: 6. Explain why each student can be A seen or not. CO C E D O E Part II 1. Go to the Physics Classroom Image Builder Simulation https://www.physicsclassroom.com/Concept-Builders/Reflection-and- Refraction/Curved-Mirror-Images/Concept-Builder The red arrow represents an object located in the region at 2. Click on the region in which the the center of curvature of a concave mirror. Identify the image of the object (the red characteristics of the image that is produced -- location, orientation, size and type. arrow) will appear. 3. Click again to change the size of the image Tap on a region to select image options for that region. Continue tapping to view all three images for that region. 4. Identify whether the image is Real or Virtual by clicking on the "Tap me." Button at the bottom. 5. Screenshot three correct simulations and explain the location, size, and type of image for each one. Identify the type of image Tap me
Step by Step Solution
There are 3 Steps involved in it

Get step-by-step solutions from verified subject matter experts