

Question: Part III1. Go to the Physics Classroom Image Builder Simulationhttps://www.physicsclassroom.com/Physics-Interactives/Reflection-and-Mirrors/Name-That-Image/Name-That-Image-InteractivePart IIIUpload a screenshot of four correctly identified images with the ray diagrams. Explain why the
Part III1. Go to the Physics Classroom Image Builder Simulationhttps://www.physicsclassroom.com/Physics-Interactives/Reflection-and-Mirrors/Name-That-Image/Name-That-Image-InteractivePart IIIUpload a screenshot of four correctly identified images with the ray diagrams. Explain why the image appears in the location where it does and why it is larger, smaller, or the same size as the object. Explain whether the image is virtual or real.
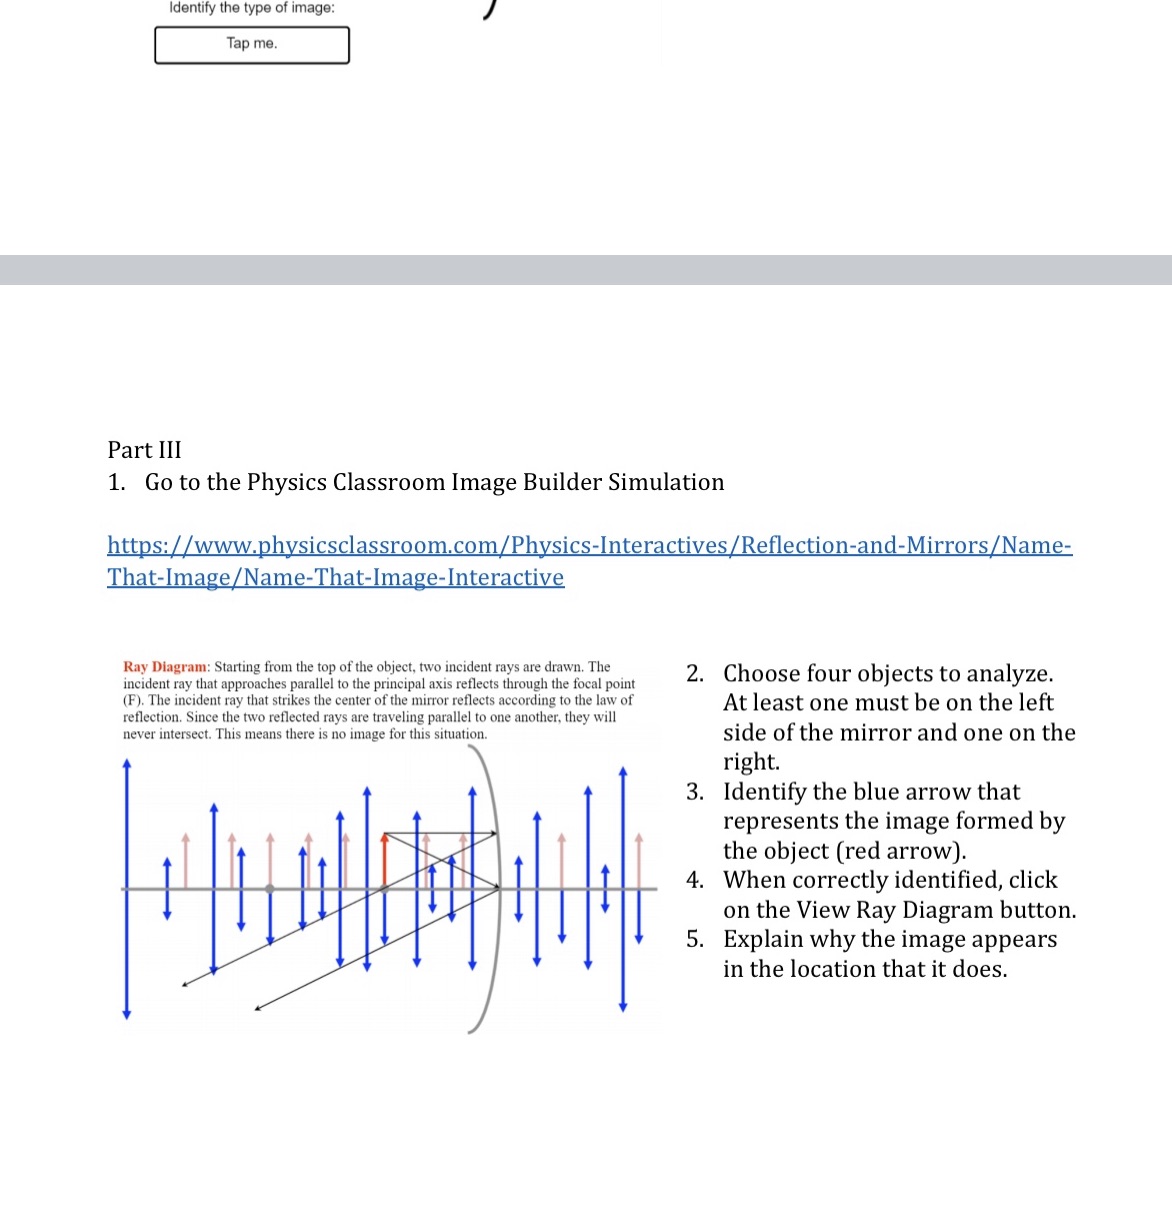
Identify the type of image: I Part III 1. Go to the Physics Classroom Image Builder Simulation h Ray Dlagram: Starting from the top of the object. two incident rays are drawn. The - incident ray that approaches parallel to the principal axis reects dtrough the focal point 2' C110 053 four 0b] eCts to analyze' (F). The incident ray that strikes the center of the mirror reects according to the law of At least one must be on the left reection. Since the two reflected rays are traveling parallel to one another. theyr will . . never intersect. This means there is no image for this situation. Slde of the m1rror and o ne on the right. 3. Identify the blue arrow that represents the image formed by the object [red arrow). 4. When correctly identied, click on the View Ray Diagram button. 5. Explain why the image appears in the location that it does
Step by Step Solution
There are 3 Steps involved in it

Get step-by-step solutions from verified subject matter experts