

Question: Windows Powershell Windows Powershell Copyright (C) Microsoft Corporation. All rights reserved. Try the new cross-platform Powershell https://aka.ms/pscore 6 PS C: Usersa-y cd user 1 Cloning
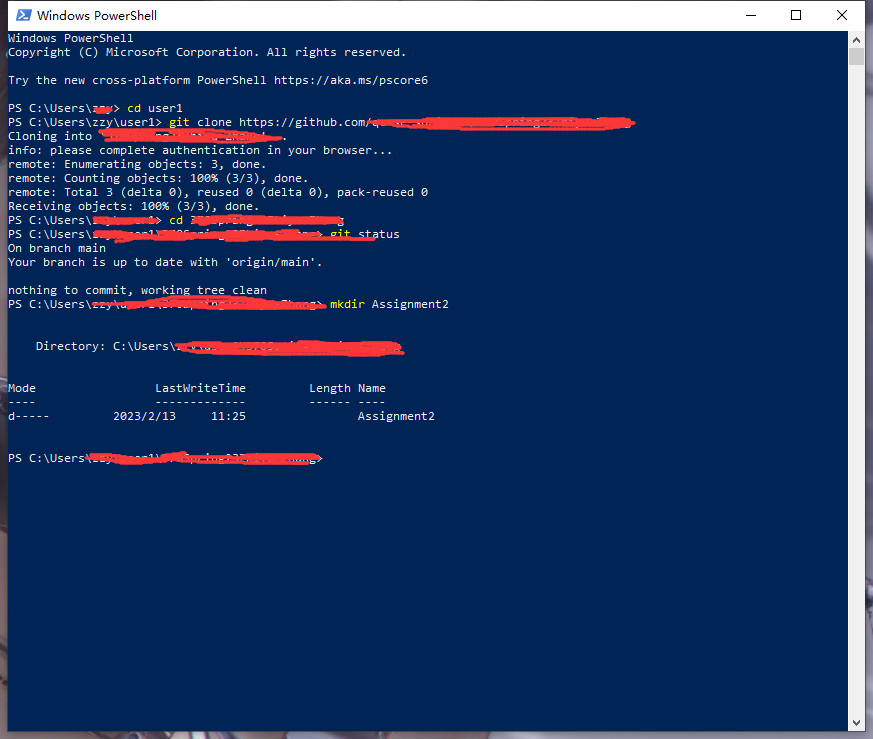
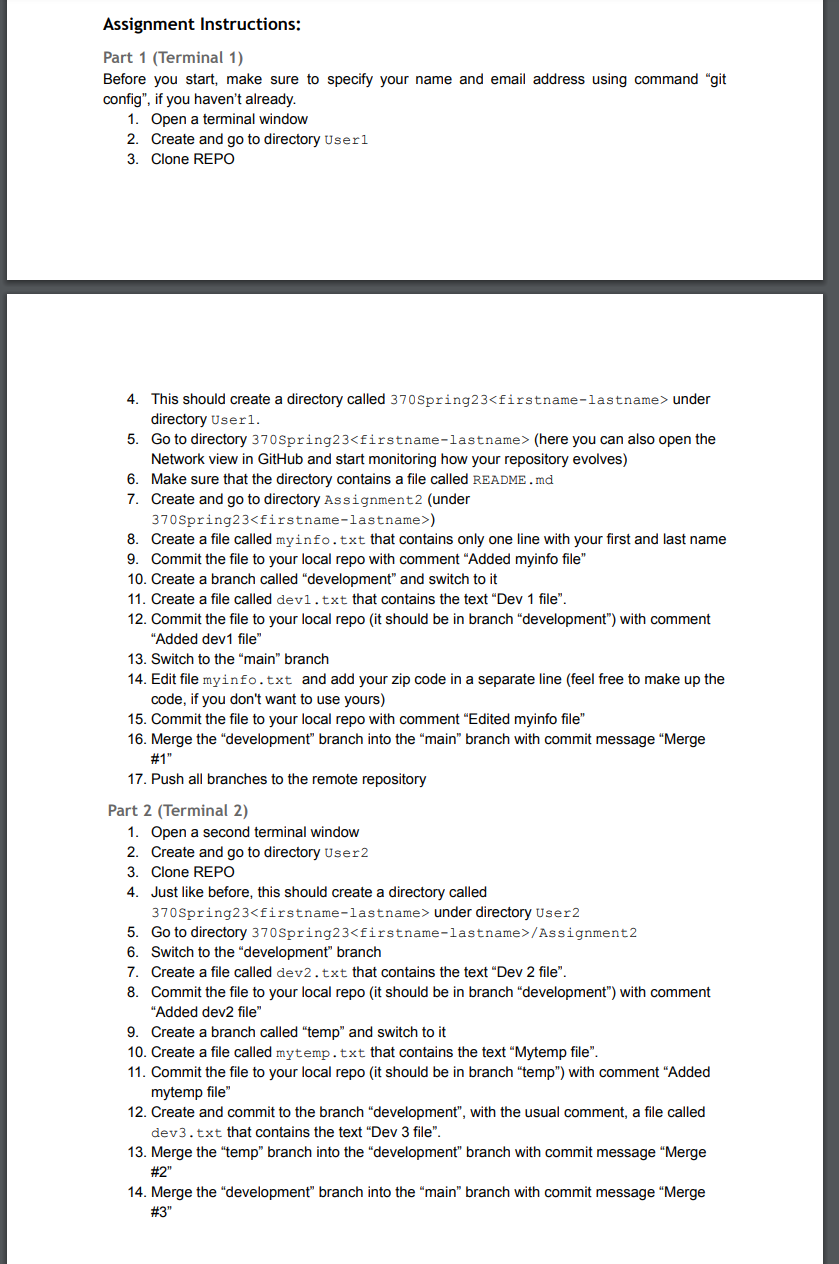
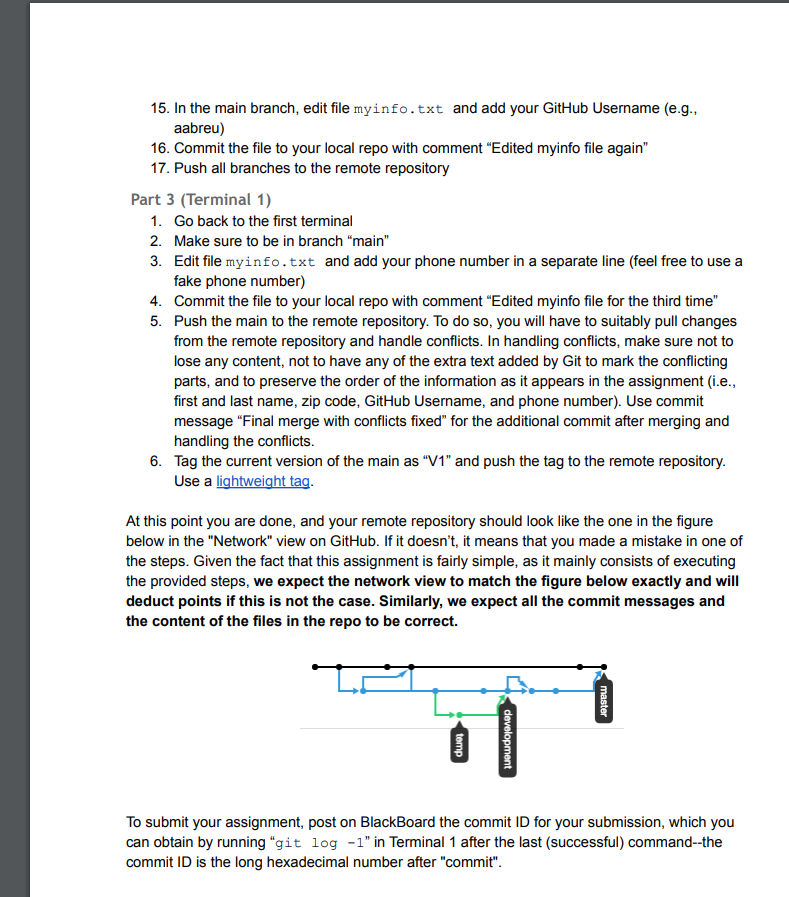
Windows Powershell Windows Powershell Copyright (C) Microsoft Corporation. All rights reserved. Try the new cross-platform Powershell https://aka.ms/pscore 6 PS C: \Users\a-y cd user 1 Cloning into info: please complete authentication in your browser... remote: Enumerating objects: 3, done. remote: Counting objects: 100\% (3/3), done. remote: Total 3 (delta ), reused (delta ), pack-reused Receiving objects: 100%(3/3), done. On branch main Your branch is up to date with 'origin/main'. nothing to commit, working tree clean Directory: C: \ Users \ Mode LastwriteTime Length Name d--. 2023/2/1311:25 Assignment2 PS C: \Users Assignment Instructions: Part 1 (Terminal 1) Before you start, make sure to specify your name and email address using command "git config", if you haven't already. 1. Open a terminal window 2. Create and go to directory User 1 3. Clone REPO 4. This should create a directory called 370 spring 23 under directory User 1. 5. Go to directory 370 Spring 23 (here you can also open the Network view in GitHub and start monitoring how your repository evolves) 6. Make sure that the directory contains a file called README. md 7. Create and go to directory Assignment 2 (under 370 Spring 23 ) 8. Create a file called myinfo.txt that contains only one line with your first and last name 9. Commit the file to your local repo with comment "Added myinfo file" 10. Create a branch called "development" and switch to it 11. Create a file called dev1.txt that contains the text "Dev 1 file". 12. Commit the file to your local repo (it should be in branch "development") with comment "Added dev1 file" 13. Switch to the "main" branch 14. Edit file myinfo.txt and add your zip code in a separate line (feel free to make up the code, if you don't want to use yours) 15. Commit the file to your local repo with comment "Edited myinfo file" 16. Merge the "development" branch into the "main" branch with commit message "Merge \#1" 17. Push all branches to the remote repository Part 2 (Terminal 2) 1. Open a second terminal window 2. Create and go to directory user 2 3. Clone REPO 4. Just like before, this should create a directory called 370 Spring 23 under directory user2 5. Go to directory 370 Spring23>/ Assignment 2 6. Switch to the "development" branch 7. Create a file called dev2.txt that contains the text "Dev 2 file". 8. Commit the file to your local repo (it should be in branch "development") with comment "Added dev2 file" 9. Create a branch called "temp" and switch to it 10. Create a file called mytemp. txt that contains the text "Mytemp file". 11. Commit the file to your local repo (it should be in branch "temp") with comment "Added mytemp file" 12. Create and commit to the branch "development", with the usual comment, a file called dev3.txt that contains the text "Dev 3 file". 13. Merge the "temp" branch into the "development" branch with commit message "Merge \#2" 14. Merge the "development" branch into the "main" branch with commit message "Merge \#3" 15. In the main branch, edit file myinfo.txt and add your GitHub Username (e.g., aabreu) 16. Commit the file to your local repo with comment "Edited myinfo file again" 17. Push all branches to the remote repository Part 3 (Terminal 1) 1. Go back to the first terminal 2. Make sure to be in branch "main" 3. Edit file myinfo.txt and add your phone number in a separate line (feel free to use a fake phone number) 4. Commit the file to your local repo with comment "Edited myinfo file for the third time" 5. Push the main to the remote repository. To do so, you will have to suitably pull changes from the remote repository and handle conflicts. In handling conflicts, make sure not to lose any content, not to have any of the extra text added by Git to mark the conflicting parts, and to preserve the order of the information as it appears in the assignment (i.e., first and last name, zip code, GitHub Username, and phone number). Use commit message "Final merge with conflicts fixed" for the additional commit after merging and handling the conflicts. 6. Tag the current version of the main as " V1 " and push the tag to the remote repository. Use a lightweight tag. At this point you are done, and your remote repository should look like the one in the figure below in the "Network" view on GitHub. If it doesn't, it means that you made a mistake in one of the steps. Given the fact that this assignment is fairly simple, as it mainly consists of executing the provided steps, we expect the network view to match the figure below exactly and will deduct points if this is not the case. Similarly, we expect all the commit messages and the content of the files in the repo to be correct. To submit your assignment, post on BlackBoard the commit ID for your submission, which you can obtain by running " g it log1 " in Terminal 1 after the last (successful) command--the commit ID is the long hexadecimal number after "commit
Step by Step Solution
There are 3 Steps involved in it

Get step-by-step solutions from verified subject matter experts