

Question: In Program 9.2, add the ability to move the camera around with the mouse or keyboard. To do this, you will need to utilize the
In Program 9.2, add the ability to move the camera around with the mouse or keyboard. To do this, you will need to utilize the code you developed earlier in Exercise 4.2 for constructing a view matrix. You’ll also need to assign mouse or keyboard actions to functions that move the camera forward and backward, and functions that rotate the camera on one or more of its axes (you’ll need to write these functions too). After doing this, you should be able to “fly around” in your scene, noting that the skybox always appears to remain at the distant horizon.
Program 9.2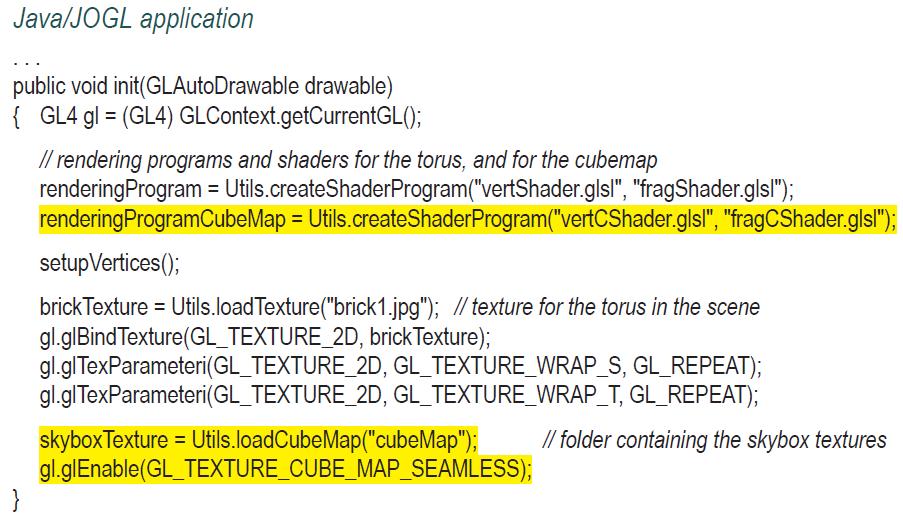


Exercise 4.2
In Program 4.1, the “view” matrix is defined in the display() function simply as the negative of the camera location:![]()
Replace this code with an implementation of the computation shown in Figure 3.13. This will allow you to position the camera by specifying a camera position and three orientation axes. You will find it necessary to store the vectors U,V,N described in Section 3.7. Then, experiment with different camera viewpoints, and observe the resulting appearance of the rendered cube.
Program 4.1

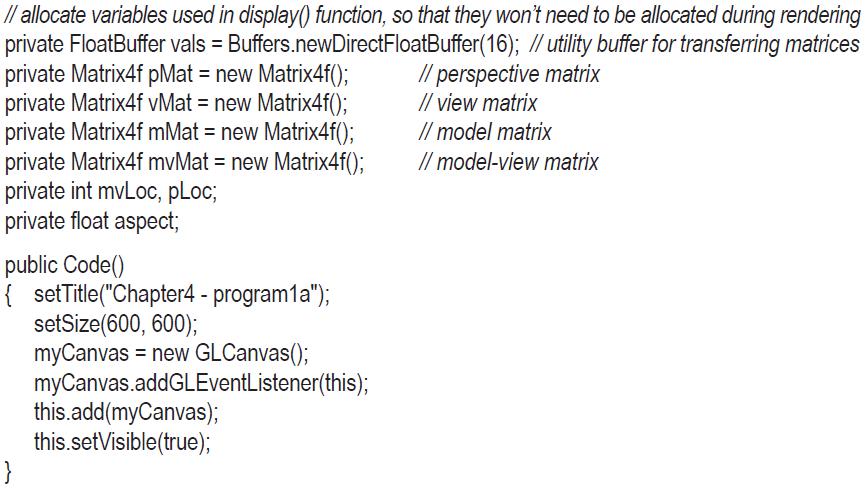
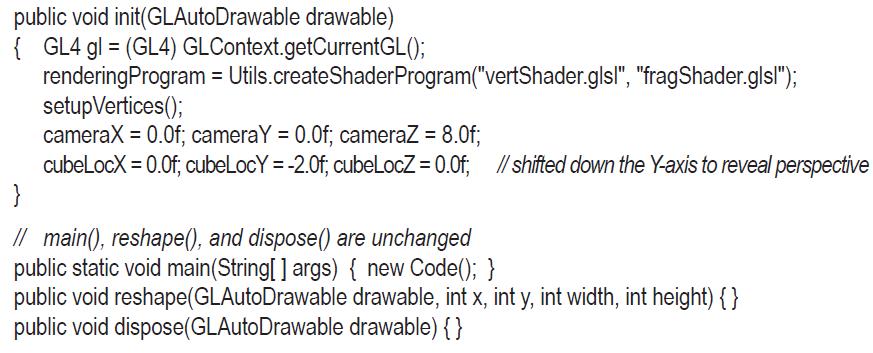
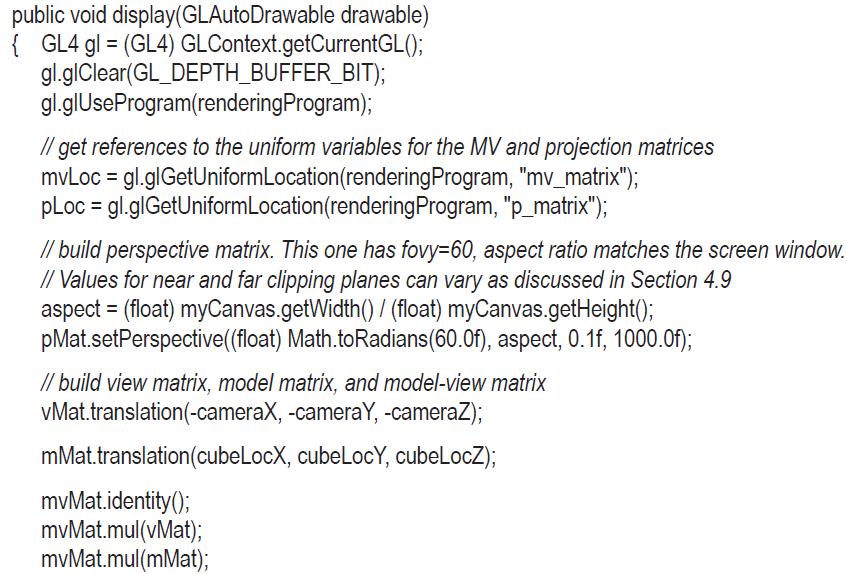
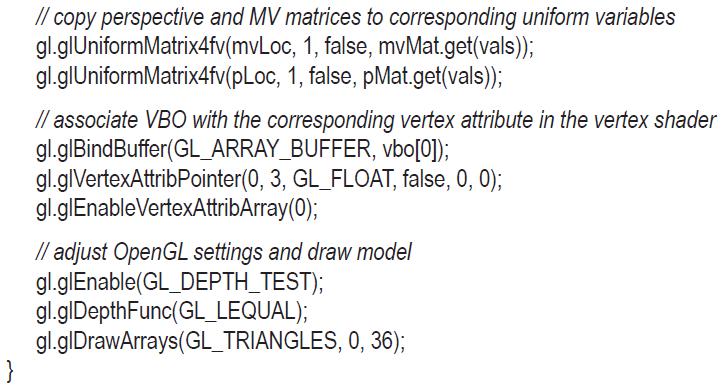
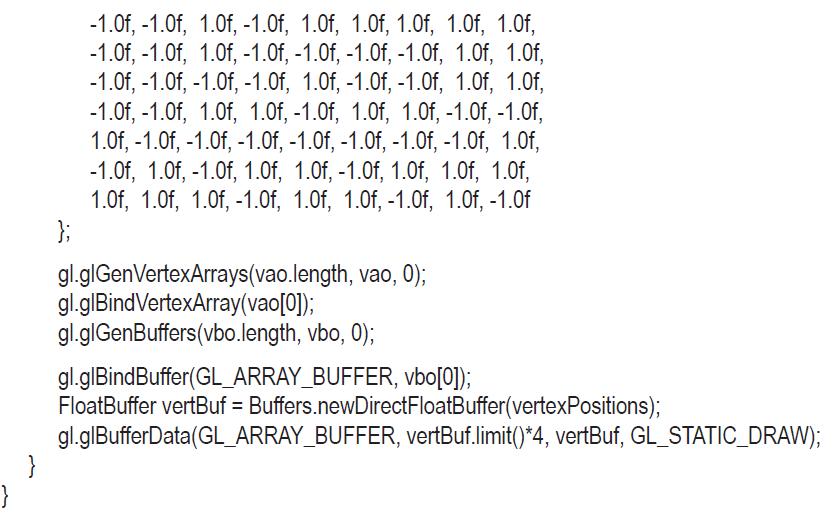
Figure 3.13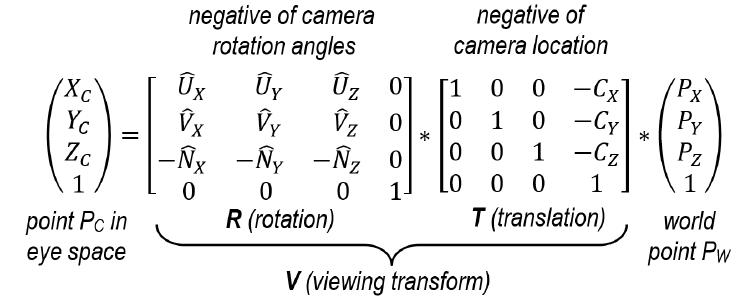
Section 3.7
So far, the transform matrices we have seen all operate in 3D space. Ultimately, however, we will want to display our 3D space—or a portion of it—on a 2D monitor. In order to do this, we need to decide on a vantage point. Just as we see our real world through our eyes from a particular point, in a particular direction, so too must we establish a position and orientation as the window into our virtual world. This vantage point is called “view” or “eye” space, or the “synthetic camera.”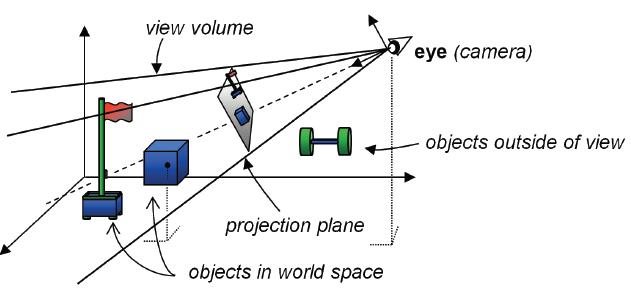
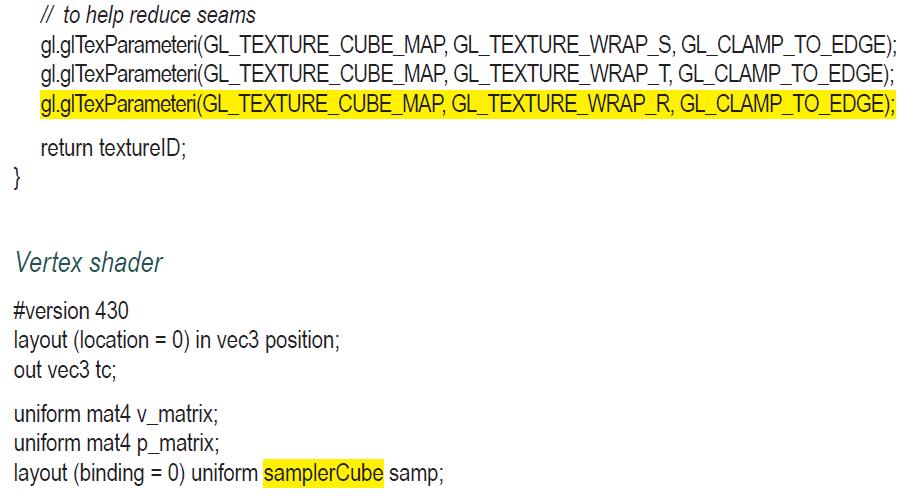
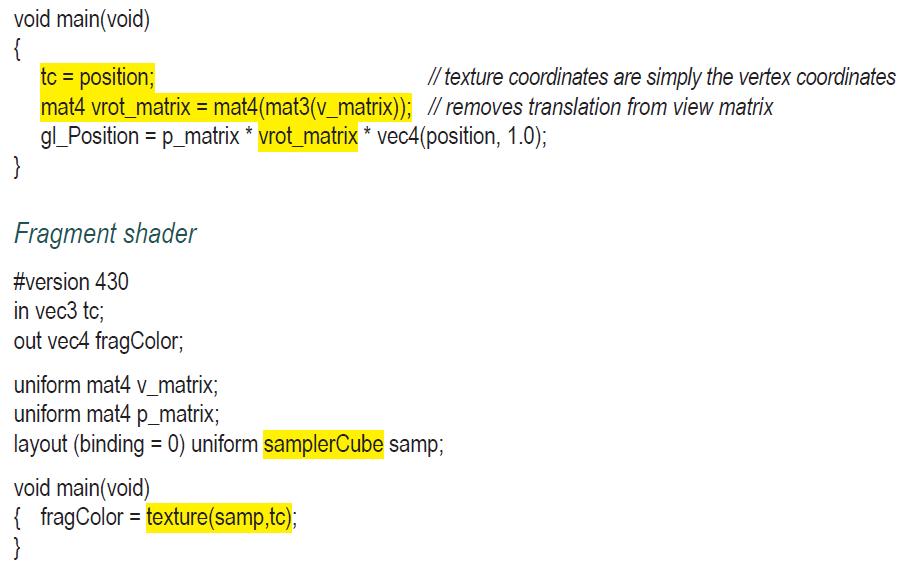
Java/JOGL application public void init(GLAutoDrawable drawable) { GL4 gl= (GL4) GLContext.getCurrentGL(); // rendering programs and shaders for the torus, and for the cubemap rendering Program = Utils.createShader Program("vertShader.glsl", "fragShader.glsl"); rendering ProgramCubeMap = Utils.createShader Program("vertCShader.glsl", "fragCShader.gisl"); setup Vertices(); brick Texture = Utils.load Texture("brick1.jpg"); // texture for the torus in the scene gl.glBind Texture(GL_TEXTURE_2D, brick Texture); gl.glTexParameteri(GL_TEXTURE_2D, GL_TEXTURE_WRAP_S, GL_REPEAT); gl.glTexParameteri(GL_TEXTURE_2D, GL_TEXTURE_WRAP_T, GL_REPEAT); skyboxTexture = Utils.loadCubeMap("cubeMap"); gl.glEnable(GL_TEXTURE_CUBE_MAP_SEAMLESS); // folder containing the skybox textures
Step by Step Solution
3.39 Rating (158 Votes )
There are 3 Steps involved in it

Get step-by-step solutions from verified subject matter experts