

Question: Lab 17 Router Configuration with RIP via command line 1. Create the following network topology in Packet Tracer. 2. Configure the PCs and the routers
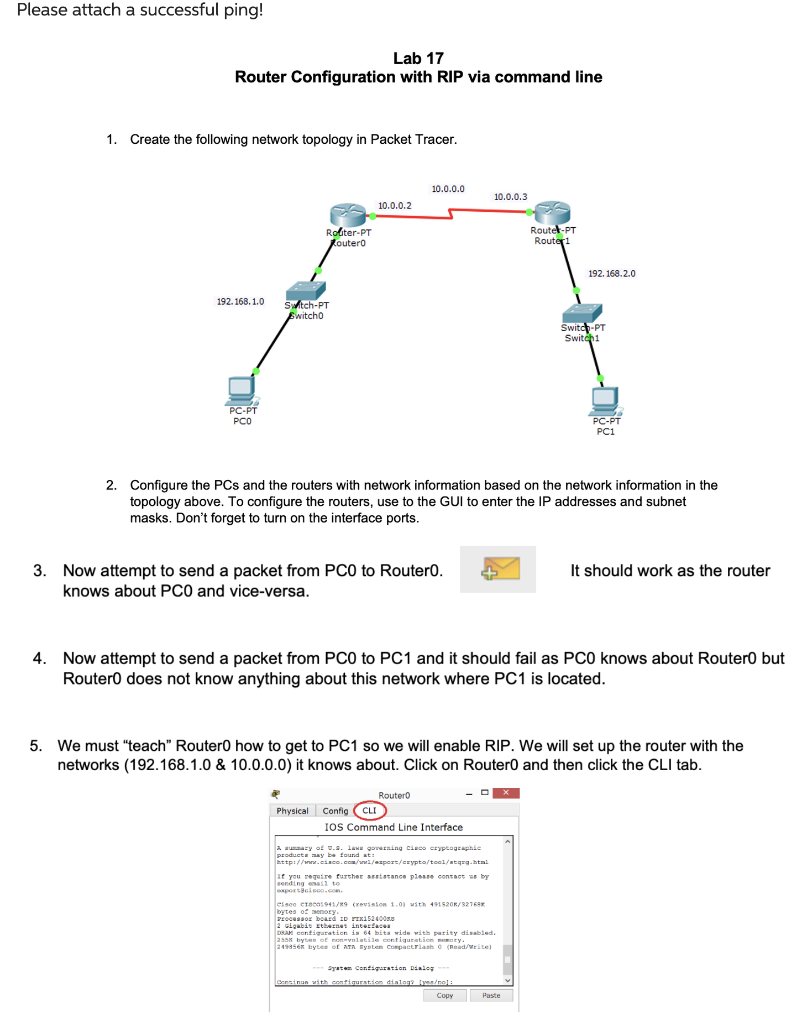
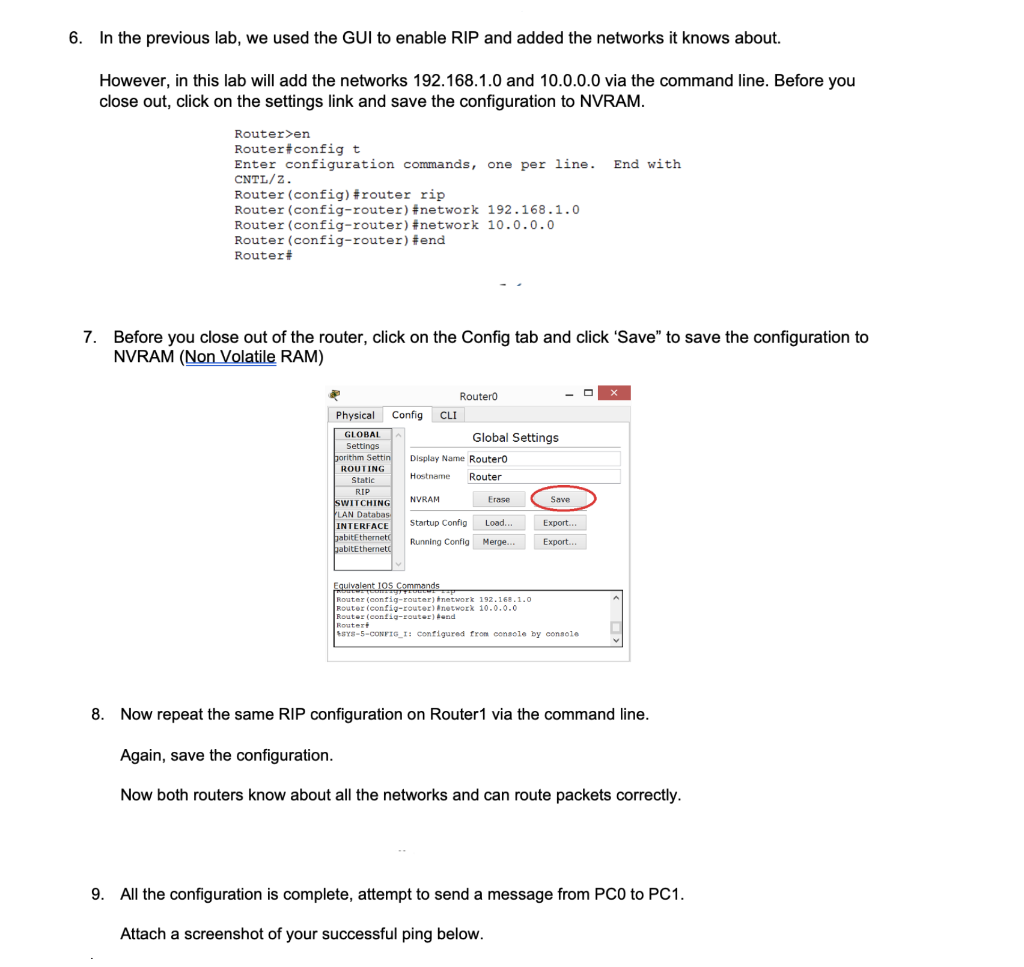
Lab 17 Router Configuration with RIP via command line 1. Create the following network topology in Packet Tracer. 2. Configure the PCs and the routers with network information based on the network information in the topology above. To configure the routers, use to the GUI to enter the IP addresses and subnet masks. Don't forget to turn on the interface ports. 3. Now attempt to send a packet from PC0 to Router0. It should work as the router knows about PC0 and vice-versa. 4. Now attempt to send a packet from PC0 to PC1 and it should fail as PC0 knows about Router0 but Router0 does not know anything about this network where PC1 is located. 5. We must "teach" Router0 how to get to PC1 so we will enable RIP. We will set up the router with the networks (192.168.1.0 \& 10.0.0.0) it knows about. Click on Router0 and then click the CLI tab. In the previous lab, we used the GUI to enable RIP and added the networks it knows about. However, in this lab will add the networks 192.168.1.0 and 10.0.0.0 via the command line. Before you close out, click on the settings link and save the configuration to NVRAM. Router>en Router\#config t Enter configuration commands, one per line. End with CNTI/z. Router (config) \#router rip Router (config-router) \#network 192.168.1.0 Router (config-router) \#network 10.0.0.0 Router (config-router) \#end Router\# 7. Before you close out of the router, click on the Config tab and click 'Save" to save the configuration to NVRAM (Non Volatile RAM) 8. Now repeat the same RIP configuration on Router1 via the command line. Again, save the configuration. Now both routers know about all the networks and can route packets correctly. 9. All the configuration is complete, attempt to send a message from PC0 to PC1. Attach a screenshot of your successful ping below
Step by Step Solution
There are 3 Steps involved in it

Get step-by-step solutions from verified subject matter experts